Shiny. Nice.
My swing arm was painted twice and I also didn’t like the finish. I ended up using hammerite smooth if I remember rightly. It suited it better for me. Slightly more Matt.
Ott's 1VJ
-
j0epere
- On the ladder

- Posts: 105
- Joined: Tue Nov 03, 2020 1:10 pm
- What Bike or Bikes Do You Own?: Yamaha XT600Z 1VJ
Suzuki XF650 Freewind - Location: Estonia
Re: Ott's 1VJ
I got a bit itchy during the week and decided to give a try on lacing and truing the wheels. First attempts on the first wheel were unsuccessfull, it took me a good one hour to try to get everything together only noticing a mistake and then having to take all apart. Motorangs foto album I found on the forum was of great help.
Once I got the front wheel together I noticed that some spokes were sticking too far thorugh the rim. Little googling made me find out that there are 2 different lenghts of spokes: 239mm and 240mm, almost impossible to differentiate by eye, but eventually got it sorted and the wheel back together.
The truing of the wheel itself was actually quite straight forward, I got the front wheel to about 1mm runout both lateral and radial and about 0.5mm to the rear wheel. Manual allows for 2mm runout (Lat and rad) before it needs attention.
How have you guys tensioned your spokes? I know there's a special torqe wrench for this, but seems a bet excessive to buy for one job. Manual states 2NM needed to tighten, and I'm not not sure I have a feel for that..
Pics below:
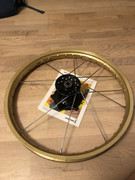
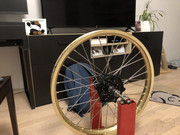
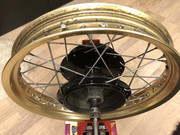
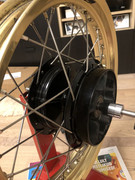
Once I got the front wheel together I noticed that some spokes were sticking too far thorugh the rim. Little googling made me find out that there are 2 different lenghts of spokes: 239mm and 240mm, almost impossible to differentiate by eye, but eventually got it sorted and the wheel back together.
The truing of the wheel itself was actually quite straight forward, I got the front wheel to about 1mm runout both lateral and radial and about 0.5mm to the rear wheel. Manual allows for 2mm runout (Lat and rad) before it needs attention.
How have you guys tensioned your spokes? I know there's a special torqe wrench for this, but seems a bet excessive to buy for one job. Manual states 2NM needed to tighten, and I'm not not sure I have a feel for that..
Pics below:
-
donnybach
- Almost there

- Posts: 630
- Joined: Fri Jul 15, 2016 3:35 pm
- What Bike or Bikes Do You Own?: tenere 1vj
Tenere 700 - Previously Owned Bikes: blade, cbr6
- Location: Cardiff, UK
Re: Ott's 1VJ
That’s hardly finger tight. Just keep it even and check for movement and sound
-
j0epere
- On the ladder
- Posts: 105
- Joined: Tue Nov 03, 2020 1:10 pm
- What Bike or Bikes Do You Own?: Yamaha XT600Z 1VJ
Suzuki XF650 Freewind - Location: Estonia
Re: Ott's 1VJ
Safe to say the powder coater has already paid off (extremely subjective opinion). I have coated the handlebar clamps and fork caps and really like the results.
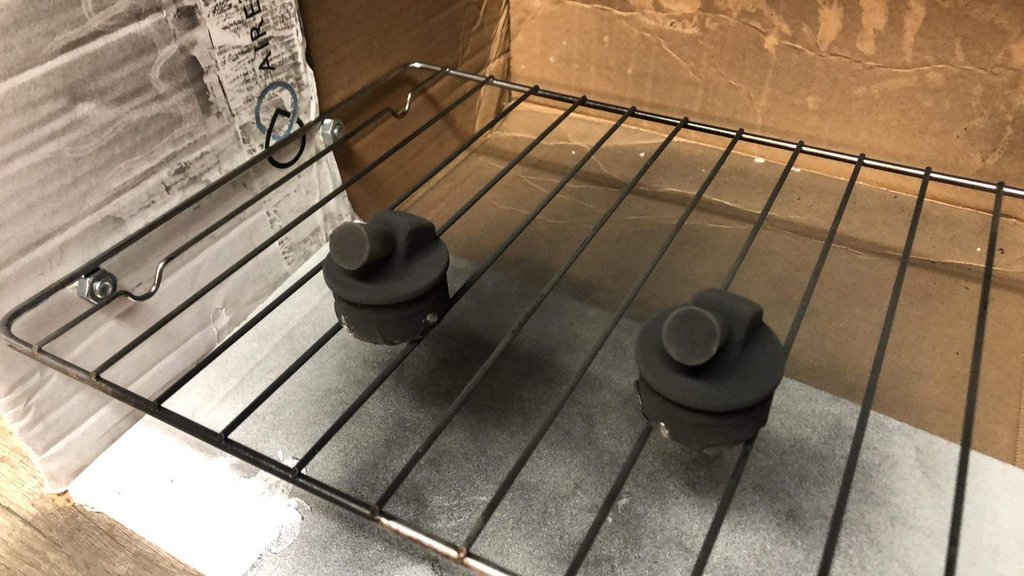
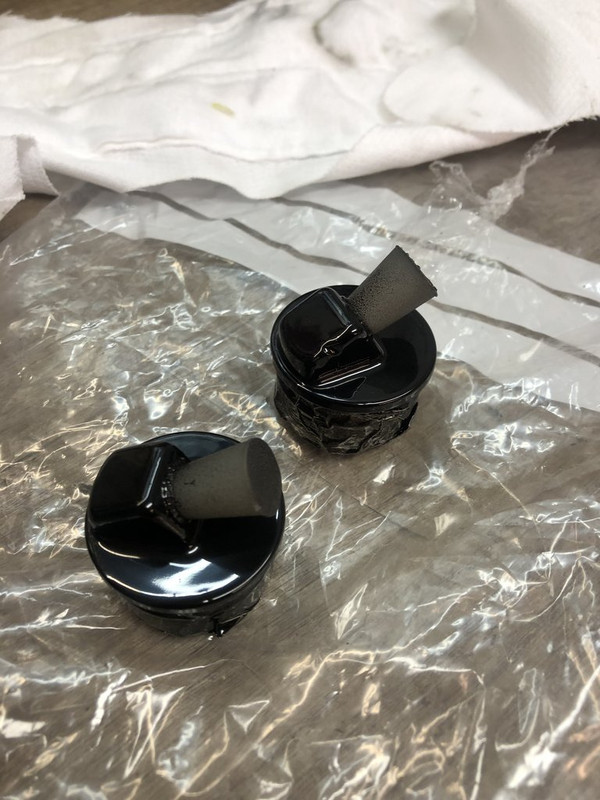
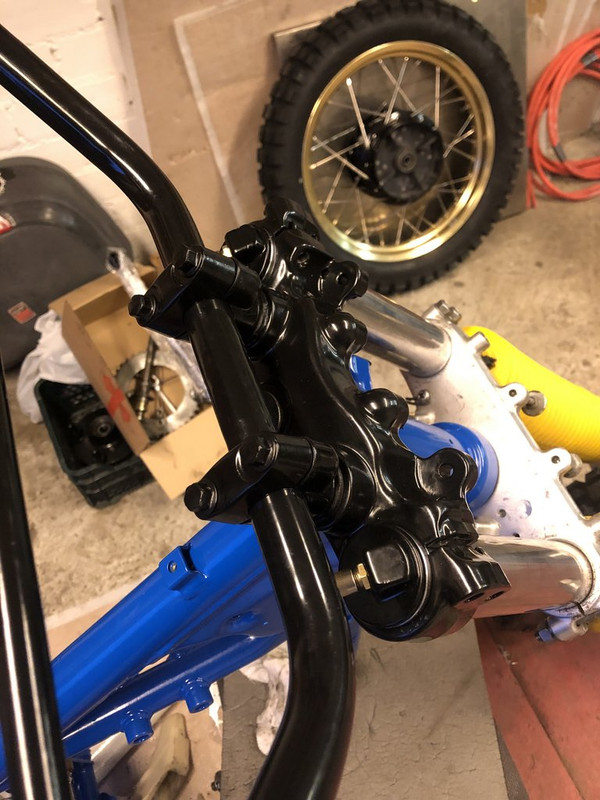
I saw that the yoke bushings are made of solid plastic(the ones sold by KEDO) so I had my friend 3D print these, made them little oversize so I could rather sand them smaller and make a tighter fit.

Also I had rust spots on the front fork tubes, just in the sweet place between the clamps where it's visible. I took the forks to a metal polishing shop next to my work for advice, but ended up having two polished forks by the end of the day. I can see that there is some chrome coating that was polished off, I will monitor these and hope that it wont cause any rusting issues due to removing the chrome coat.
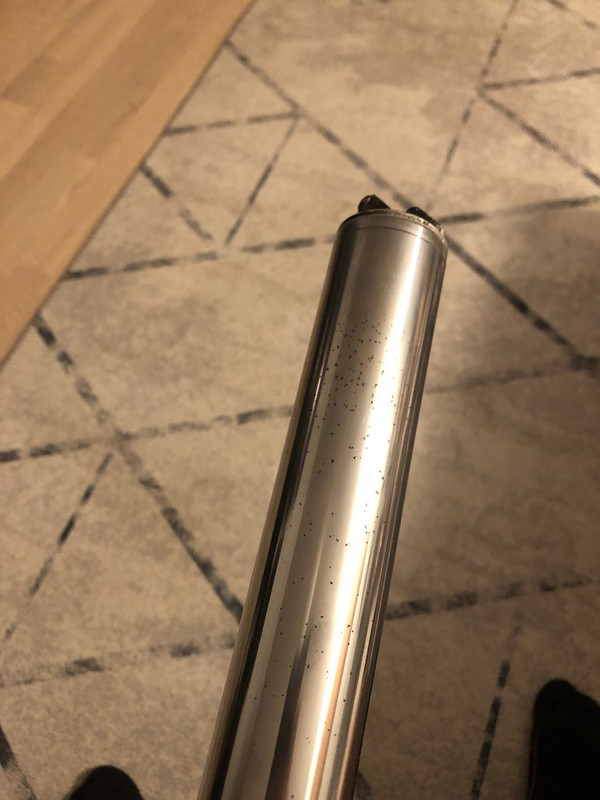

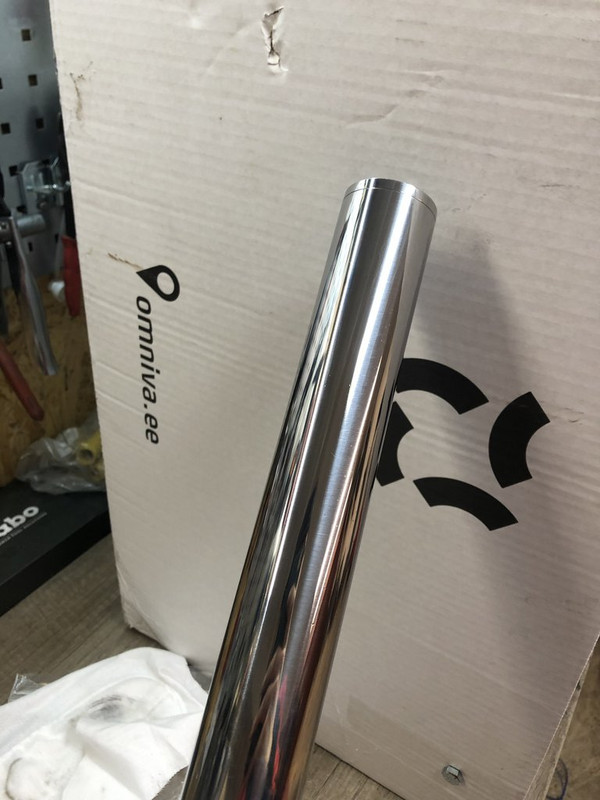
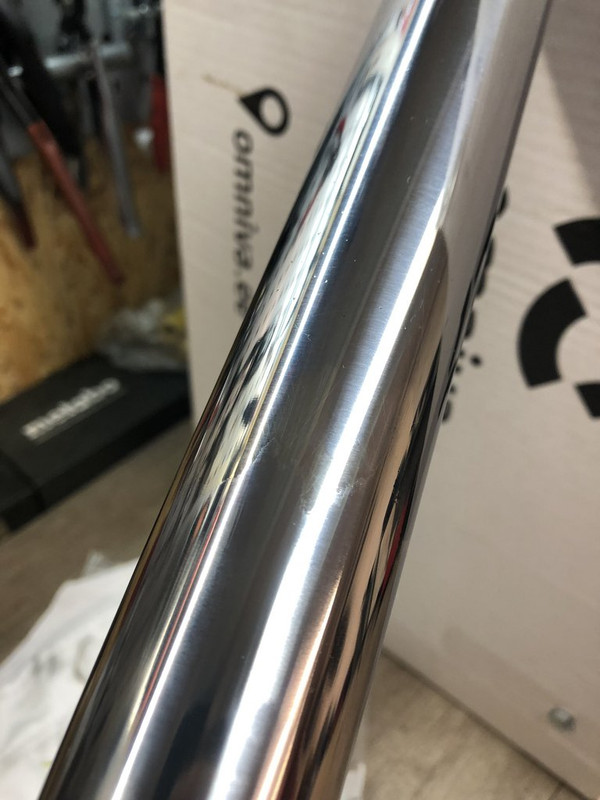
I saw that the yoke bushings are made of solid plastic(the ones sold by KEDO) so I had my friend 3D print these, made them little oversize so I could rather sand them smaller and make a tighter fit.
Also I had rust spots on the front fork tubes, just in the sweet place between the clamps where it's visible. I took the forks to a metal polishing shop next to my work for advice, but ended up having two polished forks by the end of the day. I can see that there is some chrome coating that was polished off, I will monitor these and hope that it wont cause any rusting issues due to removing the chrome coat.
-
scottieh
- Financial

- Posts: 796
- Joined: Wed Mar 30, 2011 3:58 am
- What Bike or Bikes Do You Own?: 1988 XT600Z 3AJ
1987 XT600Z 1VJ
1985 XT 600
1980 TT500
1980 XT250
2001 KTM 300XC - Previously Owned Bikes: 1982 XT550
1981 TT250
1989 Yamaha Virago 750
1994 DR650
1980 Suzuki GR650
1997 KLR 250
1986 Honda Spree - Location: Salt Lake City
Re: Ott's 1VJ
Nice work, ott! You have taking over Geoff’s role as master rebuilder on this forum
-
j0epere
- On the ladder
- Posts: 105
- Joined: Tue Nov 03, 2020 1:10 pm
- What Bike or Bikes Do You Own?: Yamaha XT600Z 1VJ
Suzuki XF650 Freewind - Location: Estonia
Re: Ott's 1VJ/ Brake caliper disassembly
I'm flattered but I've seen Geoff's thread and am not at all sure If I I can manage to go that deep into detail, I will try for sure :)scottieh wrote: Tue Oct 18, 2022 12:37 pm Nice work, ott! You have taking over Geoff’s role as master rebuilder on this forum
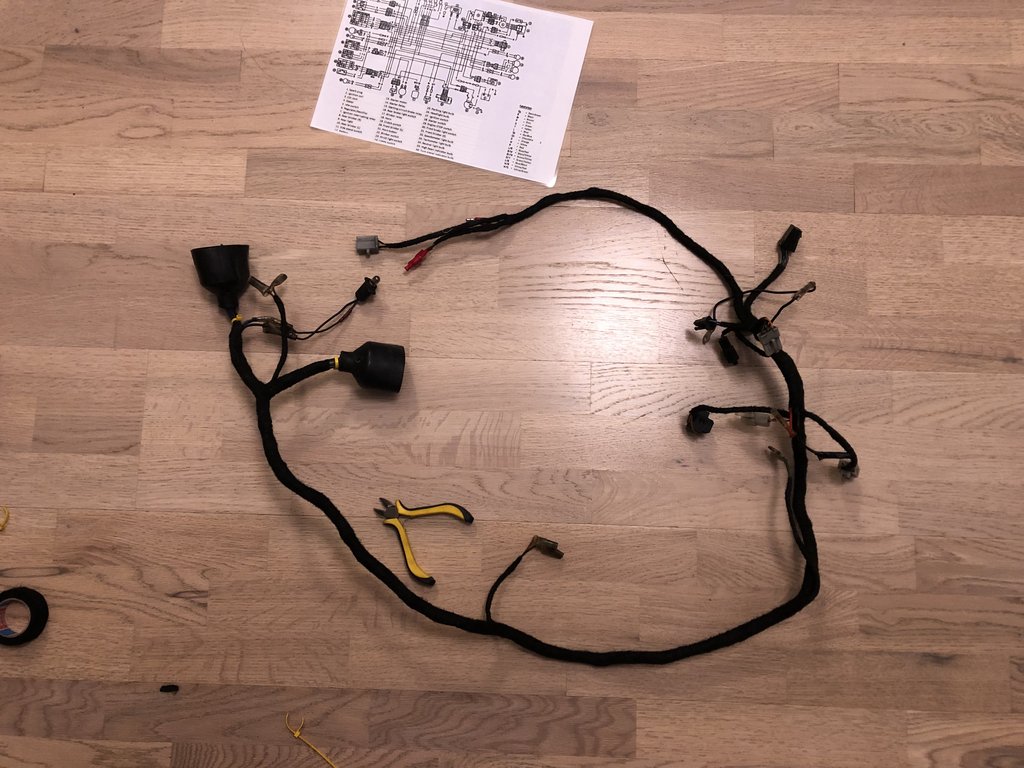
I also took a good look into the wiring loom. removed all the old insulation tape to check any broken wires. Since a regular electric insulation tape was used, then the wires were fully covered in the gooey mess and I had to give it a proper bath in brake cleaner to get everything cleaned up. To my surprise i only found 2 wires that had the thread out and were about to be broken, one was leading to the parking light and the other one to the rear brake light switch. I wrapped everything up tightly with the TESA looming tape and the result looks really nice and neat.
I will plan to add the some extra electrical elements to the bike(USB charger, heated grips, SAE outlet for jumpstarting/charging the battery), but wanted to keep the bikes wiring loom as original as possible so these will come separately later.
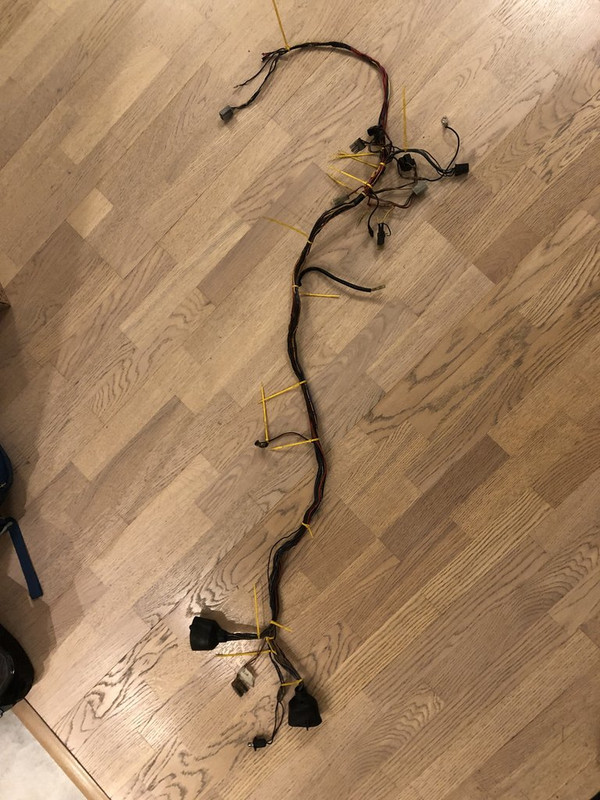
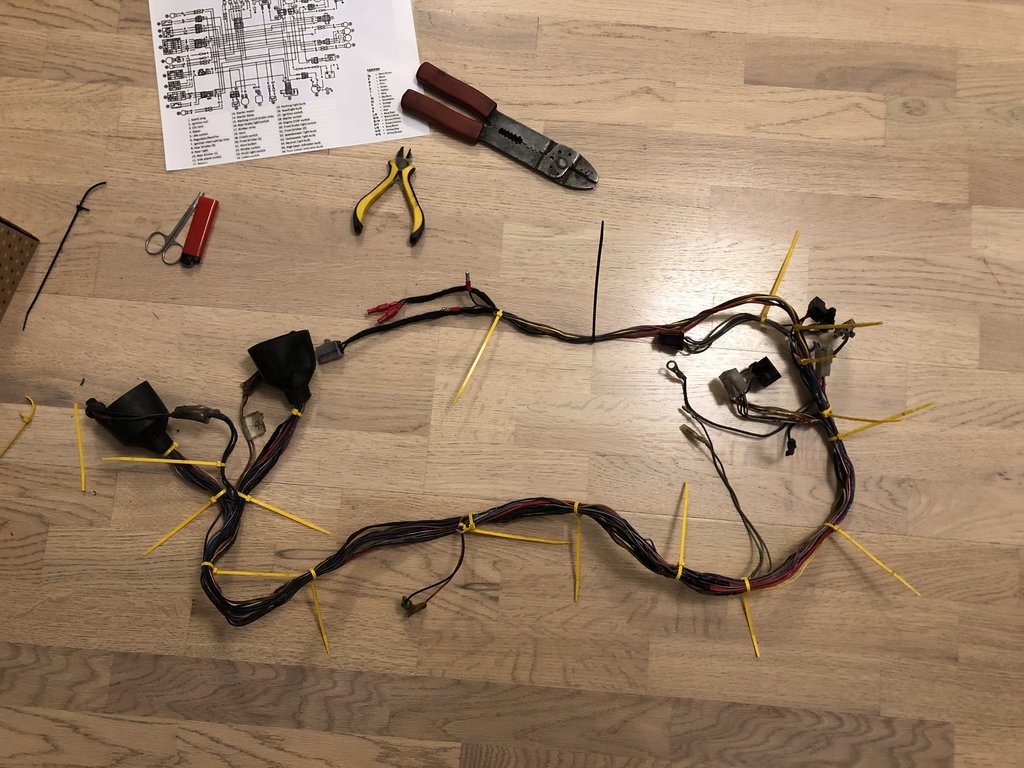
Also plan to powder coat the front brake caliper and master cylinder reservuar. Both will likely become black.
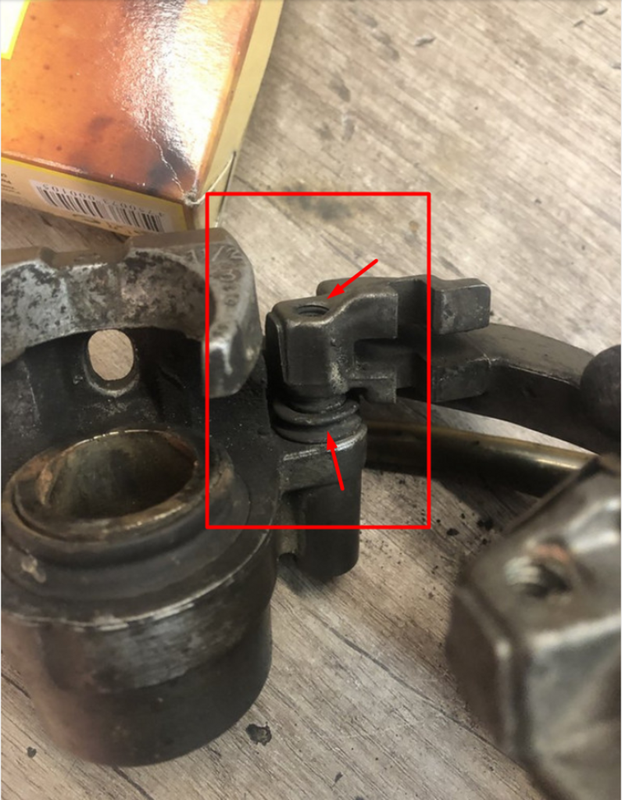
Today I had a quick look at the front calipers to check what spares need to be ordered, but noticed that the caliper is actually in two pieces that I cannot seem to separate... One part is the caliper with piston and the other one is a bracket that connects caliper to the front fork. The bracket seems to be connected via a threaded bolt and is pivoting away from the caliper to make some room for brake pads changing. When pivoting the bracket, it's moving(or should I say unscrewing) itself along the threaded rod, but since the caliper gets in the way, it impossible to move it that way. I also tried some light to medium tapping with a hammer to see if the bolt will come loose in the caliper housing, but don't want to go bat shit crazy with the hammer before I'm completely sure how it should separate. There is a rubber boot between the caliper and the bracket so I'm convinced that there should be a civil way to separate these
 I would paint it as a whole, but the rubber boot would likely just melt off when curing in in the oven..
Do you have any experiance with this caliper? the 1VJ one cylinder caliper seems to be a rare breed and theres not moch information about these available in the interwebs
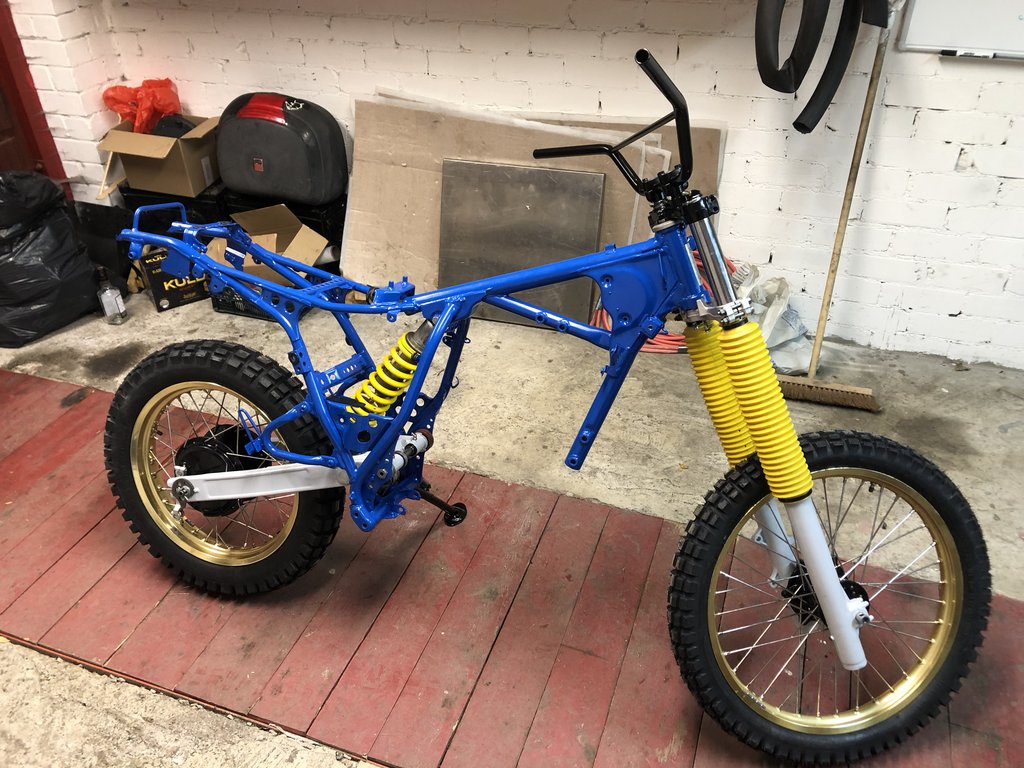
Overall the bike is finally standing on it's own!
Ott
-
scottieh
- Financial
- Posts: 796
- Joined: Wed Mar 30, 2011 3:58 am
- What Bike or Bikes Do You Own?: 1988 XT600Z 3AJ
1987 XT600Z 1VJ
1985 XT 600
1980 TT500
1980 XT250
2001 KTM 300XC - Previously Owned Bikes: 1982 XT550
1981 TT250
1989 Yamaha Virago 750
1994 DR650
1980 Suzuki GR650
1997 KLR 250
1986 Honda Spree - Location: Salt Lake City
Re: Ott's 1VJ/ Brake caliper disassembly
My recollection is that that is not a threaded bolt but just a rod that slides in and out to allow for the caliper to expand and contract when in use and depending on pad size. At least that's how I remember the 43F caliper. The rubber bellows are there to protect the supposed grease underneath. Are you able to expand or contract it at all or does it only move as though it were threaded into that hole?j0epere wrote: Tue Oct 25, 2022 7:14 pm Today I had a quick look at the front calipers to check what spares need to be ordered, but noticed that the caliper is actually in two pieces that I cannot seem to separate... One part is the caliper with piston and the other one is a bracket that connects caliper to the front fork. The bracket seems to be connected via a threaded bolt and is pivoting away from the caliper to make some room for brake pads changing. When pivoting the bracket, it's moving(or should I say unscrewing) itself along the threaded rod, but since the caliper gets in the way, it impossible to move it that way. I also tried some light to medium tapping with a hammer to see if the bolt will come loose in the caliper housing, but don't want to go bat shit crazy with the hammer before I'm completely sure how it should separate. There is a rubber boot between the caliper and the bracket so I'm convinced that there should be a civil way to separate these
Ott
-
j0epere
- On the ladder
- Posts: 105
- Joined: Tue Nov 03, 2020 1:10 pm
- What Bike or Bikes Do You Own?: Yamaha XT600Z 1VJ
Suzuki XF650 Freewind - Location: Estonia
Re: Ott's 1VJ/ Brake caliper disassembly
Yep, the bracket is only moving along the threaded rod, the bolt is totally stuck and there is no sliding happening at all.. In the morning I went past the garage and tried to shoot some rust loose fluid under the rubber boot and there was no sign of grease in there. I will try go get it loose during the weekend..scottieh wrote: Wed Oct 26, 2022 3:43 amMy recollection is that that is not a threaded bolt but just a rod that slides in and out to allow for the caliper to expand and contract when in use and depending on pad size. At least that's how I remember the 43F caliper. The rubber bellows are there to protect the supposed grease underneath. Are you able to expand or contract it at all or does it only move as though it were threaded into that hole?j0epere wrote: Tue Oct 25, 2022 7:14 pm Today I had a quick look at the front calipers to check what spares need to be ordered, but noticed that the caliper is actually in two pieces that I cannot seem to separate... One part is the caliper with piston and the other one is a bracket that connects caliper to the front fork. The bracket seems to be connected via a threaded bolt and is pivoting away from the caliper to make some room for brake pads changing. When pivoting the bracket, it's moving(or should I say unscrewing) itself along the threaded rod, but since the caliper gets in the way, it impossible to move it that way. I also tried some light to medium tapping with a hammer to see if the bolt will come loose in the caliper housing, but don't want to go bat shit crazy with the hammer before I'm completely sure how it should separate. There is a rubber boot between the caliper and the bracket so I'm convinced that there should be a civil way to separate these
Ott
I would just cut the rubber boot, but the bugger is costing 20EUR as an OEM Part

EDIT:
Did some digging and looks like that the rear brake caliper of later XT600E are very similiar to the one piston front caliper of the 1VJ. Similiar issues have occured and in one instance the Caliber body was drilled and the slider punched out from the back. Don't want to go that far at first and will leave this as a last resort option.
Ref to below:
https://www.horizonsunlimited.com/hubb/ ... -fit-65728
https://www.youtube.com/shorts/J4-pOx84iDs
https://www.youtube.com/shorts/m93BTJA8CxU
https://www.youtube.com/shorts/zEMd7-7CwrA
-
cadno
- Almost there
- Posts: 775
- Joined: Fri May 06, 2016 9:38 am
- What Bike or Bikes Do You Own?: lot's of Yamahas, quite a few Montesas, two BMWs a KTM and a GPZ1100
- Previously Owned Bikes: Far too many to list
- Location: Bangor UK
Re: Ott's 1VJ
Remove the obvious caliper bolt part number 34X 25926-00 that stops the caliper pivoting around it's mount.
Pivot the two parts backward and forward, or just leave them immersed in your cleaner of choice.Ultrasonic is your friend here. Eventually they'll start moving.
It will come off, they are not physically bolted together. The pin the caliper slides along is threaded into the caliper carrier it's a large hex 6mm from memory on the base. The expensive rubber you are talking about covers this pin and is essential in stopping dirt getting in there.
I've just had a look at the Yamaha parts diagram, it doesn't show all the constituent parts. I have a vapour blasted front caliper I can take a photo of if you don't suss it out.
Pivot the two parts backward and forward, or just leave them immersed in your cleaner of choice.Ultrasonic is your friend here. Eventually they'll start moving.
It will come off, they are not physically bolted together. The pin the caliper slides along is threaded into the caliper carrier it's a large hex 6mm from memory on the base. The expensive rubber you are talking about covers this pin and is essential in stopping dirt getting in there.
I've just had a look at the Yamaha parts diagram, it doesn't show all the constituent parts. I have a vapour blasted front caliper I can take a photo of if you don't suss it out.
-
j0epere
- On the ladder
- Posts: 105
- Joined: Tue Nov 03, 2020 1:10 pm
- What Bike or Bikes Do You Own?: Yamaha XT600Z 1VJ
Suzuki XF650 Freewind - Location: Estonia
Re: Ott's 1VJ
A bit of heat and cold treatment helped me to get the stuck pin out. Doing that I ofcourse managed to destroy the rubber boot and bend the pin itself. It doesn't have a part number and local Motorcycle shops couldn't help me with locating the part. I will to have it milled somewhere locally.
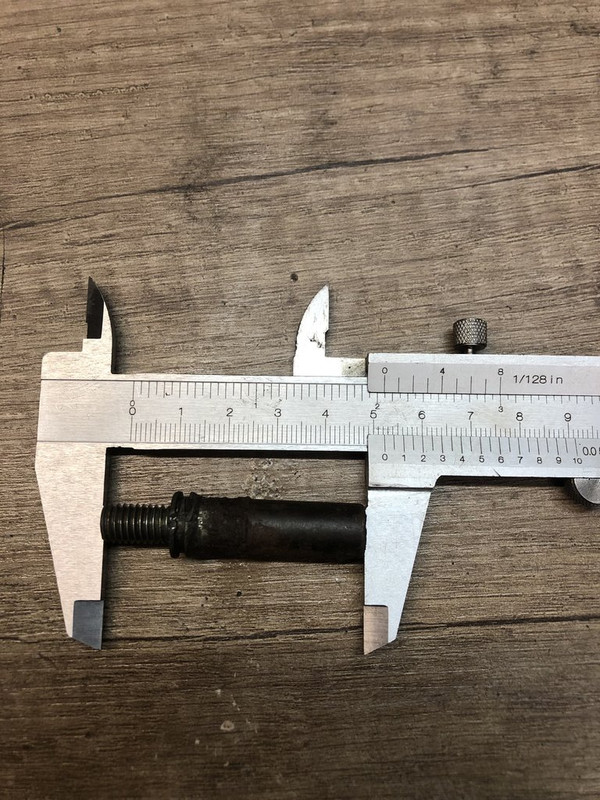
Also did some more powdercoating on small details, I read somewhere it's OK to cure the brake fluid reservuar in the oven, but the fluid window melted :) Quick googling let me know it's quite a standart part so I will just change it and save myself some time since I previously planned to polish the old one.
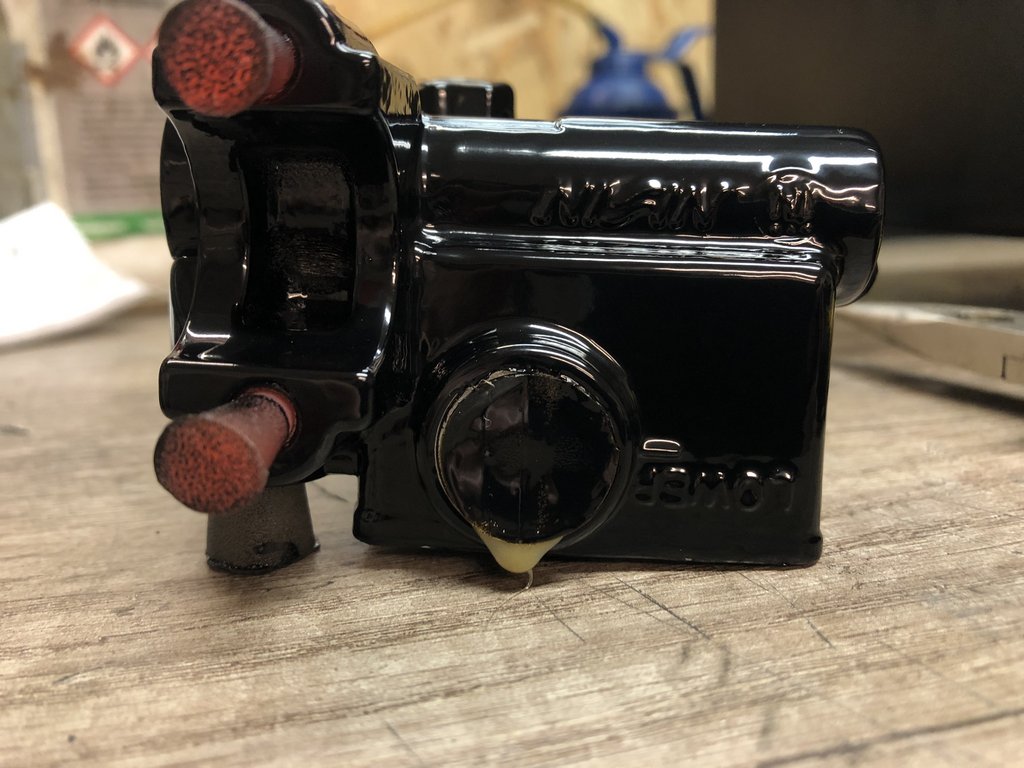
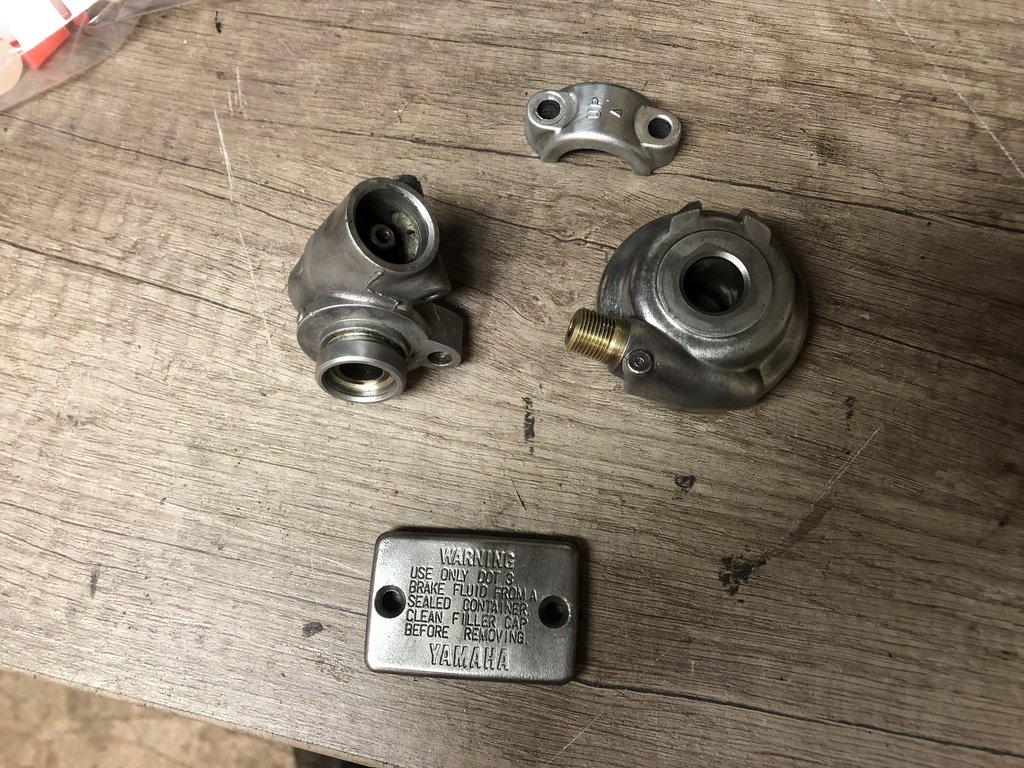
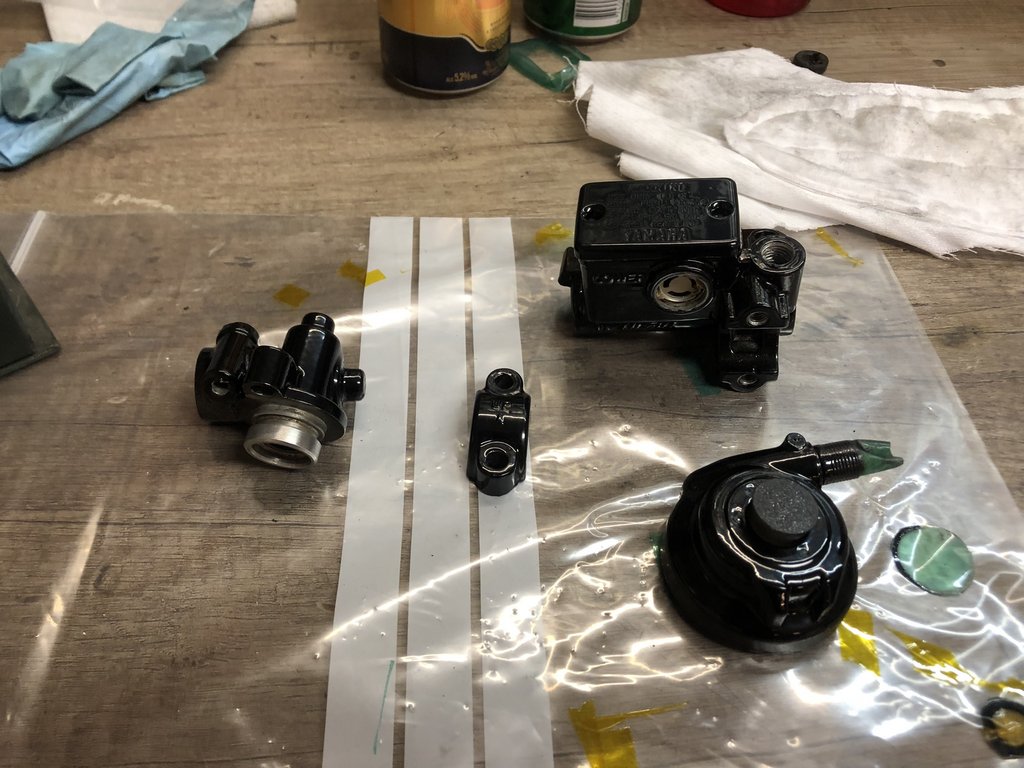
Also did some more powdercoating on small details, I read somewhere it's OK to cure the brake fluid reservuar in the oven, but the fluid window melted :) Quick googling let me know it's quite a standart part so I will just change it and save myself some time since I previously planned to polish the old one.