Page 7 of 11
Re: Ott's 1VJ
Posted: Mon Feb 27, 2023 11:12 am
by j0epere
So did another test run on the engine and noticed the following:
Compression:
This time I let the engine idle for 5+ minutes and turned off the fuel taps to let the carbs run dry. after that immediately removed the tank/plug and started testing. I used my coworkers compression tester, he told me that it likely reads a bit more than actual(according to experience). After a few kicks I got 170 PSI, for reference I also tried the tester I used previously and got a reading of 150 PSI. So looks like it's all good on that front.
Carbs:
When the engine was warmed up I tried to go to WOT and the engine started to bog down and sputter at about 6500RPM. As an addition it threw out quite a bit of dark smoke and when removing the spark plug, it was totally black. So it looks like I'm running pretty rich at WOT, should I focus on the secondary carb for this? I remember the primary carb main jet was changed to 140 last year. I haven't written down the jet size for secondary carb, but I think it was as per manual.
It was also smelling a bit rich when operating on lower RPM's.
Oil leak:
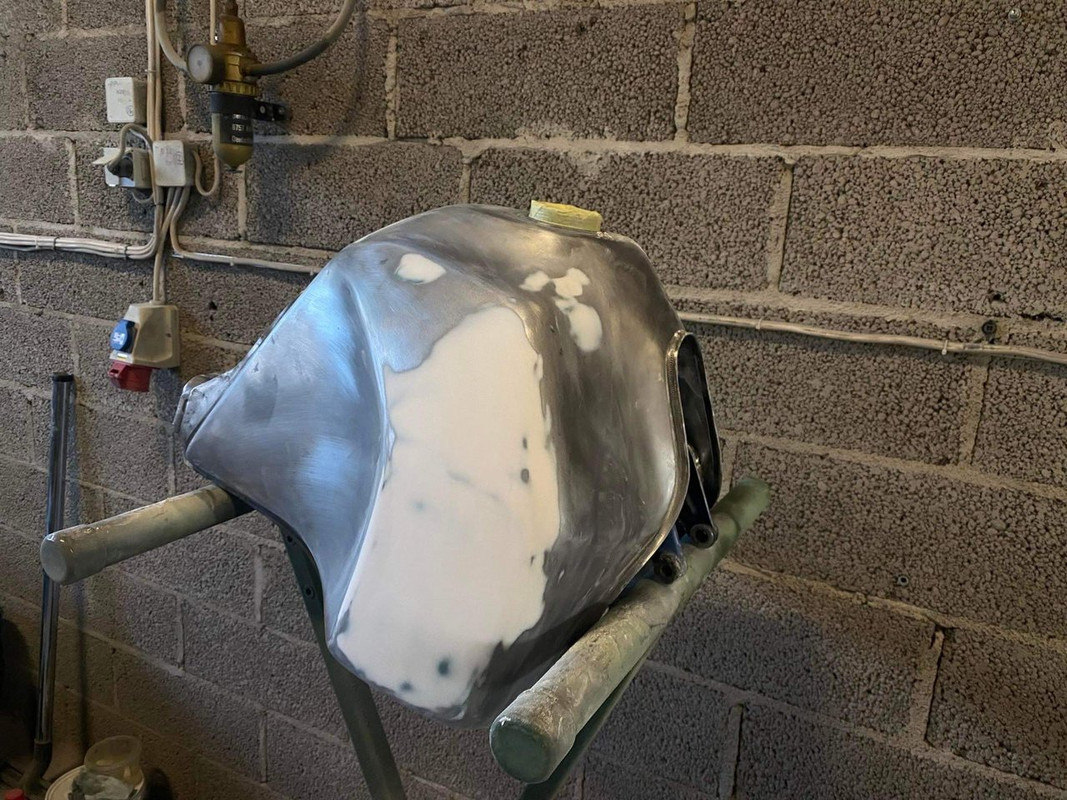
Noticed a small oil leak from the oil tank. I have changed all the gaskets for the hoses and it seems that it's not leaking from there. A small drop accumulates to the lower seam and drips straight to the exhaust. Cannot make out where it's coming from, but I will clean and test it again, I hope it's not coming from the seams since I just got the tank freshly painted..
Adjustments needed:
The rear brake pedal is awful close to the clutch cover and seems to have quite a bit of play. There is no bushing between the pedal and the axle it's moving on so it has be that way. Currently I adjusted the pedal so much, that the brake rod is going against the swingarm and there is almost no room to adjust it any further.
I think I will need to bend the pedal and that seems the most logical option.
Re: Ott's 1VJ
Posted: Mon Feb 27, 2023 11:02 pm
by donnybach
First thing I’d do is

the carb off. Check it’s all set to standard.
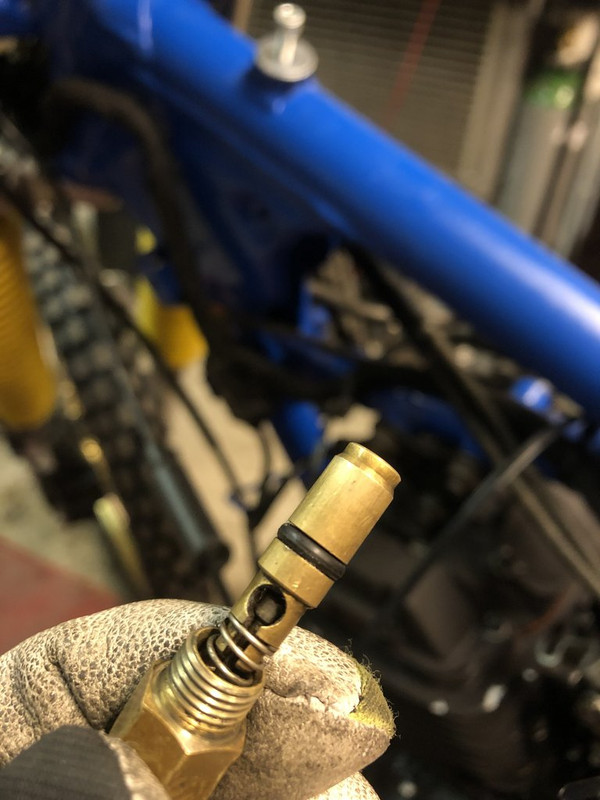
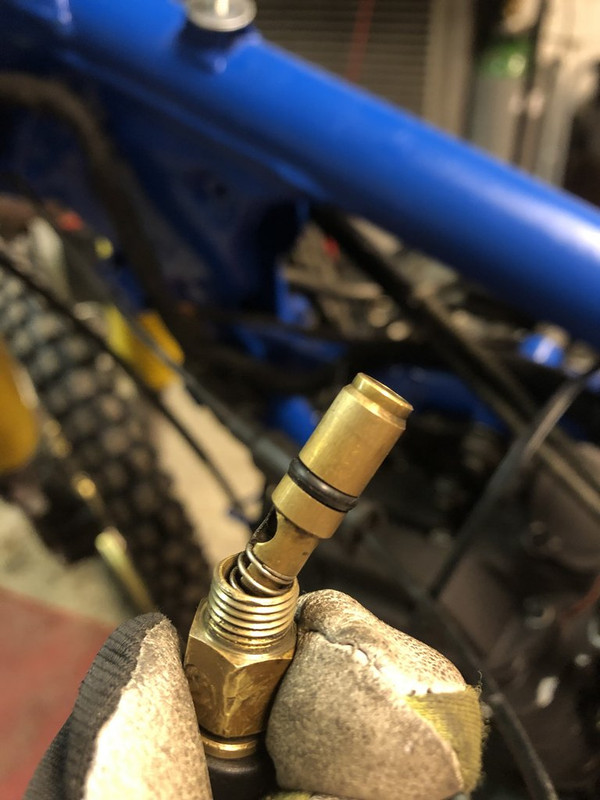
Maybe before that, unscrew the choke from the carb ( nothing else needs removing for access) and give us a picture of it.
What was the fuel level like in the float bowl when jacked up level? Should be 6-8 mm below gasket. Might even be float valve sticking. It would also over fuel the second carb. Air must be ok as it’s all new. Unless you left your sandwiches in the airbox?


Carb sync must be on too. Primary carb piston bottom raises to <1mm above choke/passage. Use a 7mm drill shaft under the primary piston, and adjust the sync screw to just contact the plate. This should mean when at full throttle the secondary butterfly valve is flat/parallel. If set too much it would mean the valve is closing again restricting airflow but still raising the needle more.
For settings I only have a different pilot jet for the arrow can (48) and the 145 or 150 main jet (standard). Secondary is 125. The bowl level is the pain in the arse to get ideal. Just start at 7mm (26mm float height).
Choke first though.
Just reading through the thread again and realised it was like this before. So ignore the identical settings advice

. Still want to see a pic of the choke piston though.
Re: Ott's 1VJ
Posted: Thu Mar 02, 2023 9:35 am
by j0epere
donnybach wrote: Mon Feb 27, 2023 11:02 pm
First thing I’d do is
the carb off. Check it’s all set to standard.
Maybe before that, unscrew the choke from the carb ( nothing else needs removing for access) and give us a picture of it.
What was the fuel level like in the float bowl when jacked up level? Should be 6-8 mm below gasket. Might even be float valve sticking. It would also over fuel the second carb. Air must be ok as it’s all new. Unless you left your sandwiches in the airbox?
Carb sync must be on too. Primary carb piston bottom raises to <1mm above choke/passage. Use a 7mm drill shaft under the primary piston, and adjust the sync screw to just contact the plate. This should mean when at full throttle the secondary butterfly valve is flat/parallel. If set too much it would mean the valve is closing again restricting airflow but still raising the needle more.
For settings I only have a different pilot jet for the arrow can (48) and the 145 or 150 main jet (standard). Secondary is 125. The bowl level is the pain in the arse to get ideal. Just start at 7mm (26mm float height).
Choke first though.
Just reading through the thread again and realised it was like this before. So ignore the identical settings advice
. Still want to see a pic of the choke piston though.
Hi Donny, Thanks for the feedback!
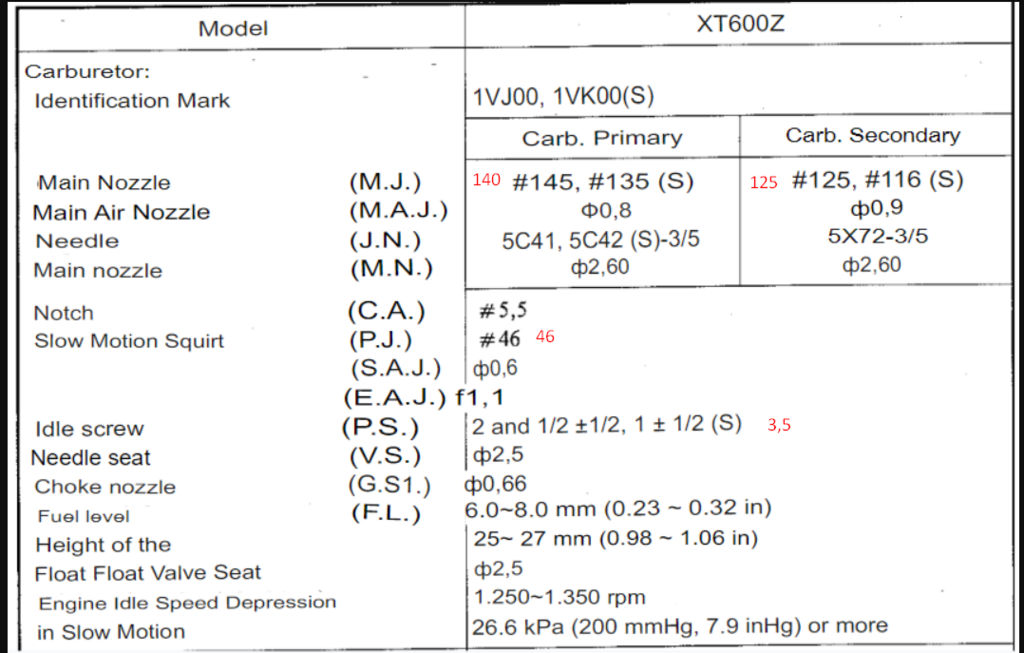
I took the carbies off and looks like I'm more or less in spec. I even have the main jet a bit smaller than spec. One thing I noticed that the pilot screw was 3,5 turns out, will try how it operated on 2,5 turns out today, but not sure if it make that big of a difference. The secondary butterfly valve is set parallel once WOT.
Setting up the float bowl height is quite a bitch and hard to understand.. Do you mean that the float bowl should be 26mm from the gasket surface like below?
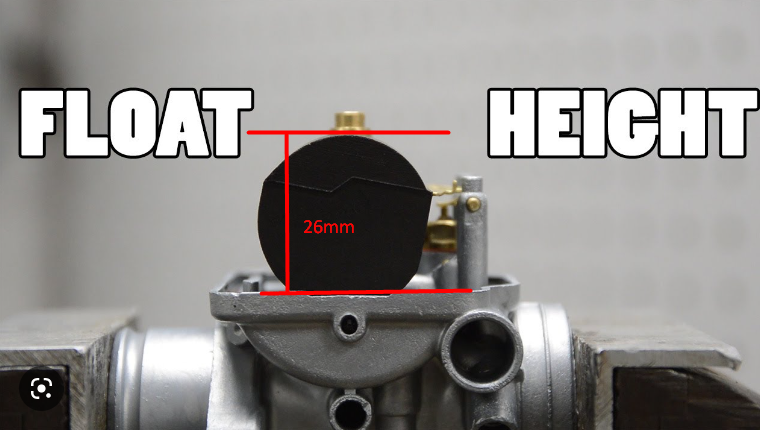
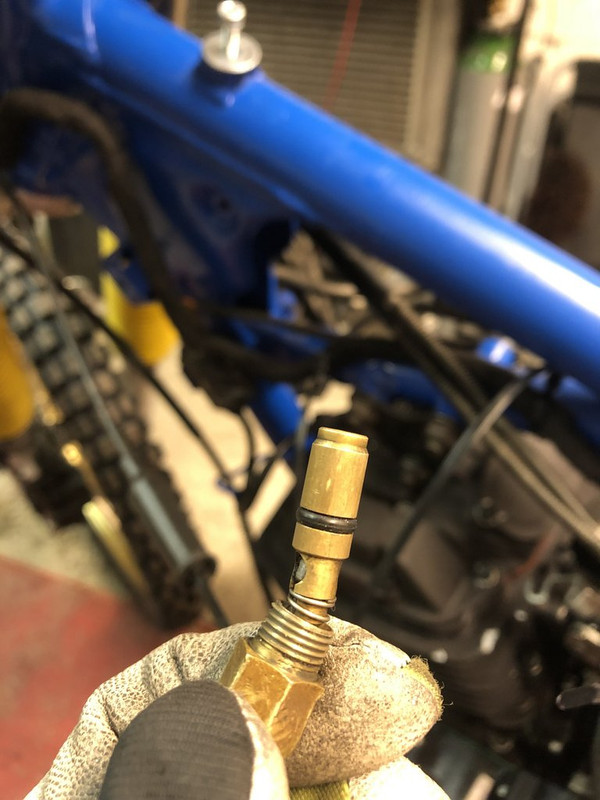
I think I will try to block off the choke fuel flow today and see how it reacts, I will also put the pictures below of the piston, let me know what you think!
Below the pic where I have my specs compared to manual, mine written in red.
Re: Ott's 1VJ
Posted: Thu Mar 02, 2023 7:19 pm
by donnybach
Yes that’s right for the float height. When you do the fuel level, it’s a bit awkward. You have to jack the bike so the carbs are level, and run the engine with a clear tube (or proper Yamaha tool) from the bowls drain, held next to the carb to see the fuel level in it when it settles. That’s the 6-8 mm below gasket level measurement. Too high would make the symptoms you have. It would also show you if your float valve was sticking. It’s all better explained in your manual than I can do.
The choke piston looks fine as long as the rubber in the end is still there.
Wouldn’t make too much difference I think but the coasting enricher on the side might be stuck. Check the spring is on the correct side.
It’s weird. If no air restriction it’s got to be leaking in somewhere. So I’d put a slightly lubed choke in and physically push it all the way closed checking from the view at the front of the carb. I’d check for a leaking float valve by testing it on the bench with a fuel supply. Then once together I’d check the fuel height. Better with two people.
Once the carbs together you could put a gravity fed fuel supply to it on the bench and see if the fuel is spilling over to the Venturi of either carb.
Hope you have luck with it.
Re: Ott's 1VJ
Posted: Fri Mar 03, 2023 10:33 am
by j0epere
Thanks for the great insights, seeing the other topics as well you seem to be the master of carbs around here :D
Yesterday I tried to close off the choke circuit, I clogged the passage in the carb which provides fuel to the choke and also put the pilot screw back to 2,5 turns out. It seemed at bit better but was still experiencing bogging at the 6500 RPM mark and exhaust smelled as rich as ever.
I removed the carbs again and changed the main jet, I had one 120 laying around so figured I give it a try. Also opened up the choke again. It was running really good with that one, I was able to rev up to 8K without any issued, after that it still started to give a bit of smoke. Overall the bike reacted to throttle a lot better and the exhaust didn't smell as rich.
Now the question is have I solved the problem or is the smaller main jet just masking the underlaying problem that I'm having. Feels weird to go to 120 (if 145 is standard) and also considering that I have an Sebring aftermarket exhaust.
I will leave it like that for now, once I will get it fully running I can see how it acts when driving and make amends if needed.
One other thing that I noticed, there was a small leak under the starter motor. I was afraif it was the clutch actuating arm, but looking closer it seemed that the crank breather hose was not installed correctly. Since it's at an angle and fairly tight, it's such a bitch to install, I got it fairly hot and installed eventually. After that cleaned everything up, and after running the engine seemed that the leaking has stopped.
Still need to monitor this one, since I'm not fully convinced where the leak came from
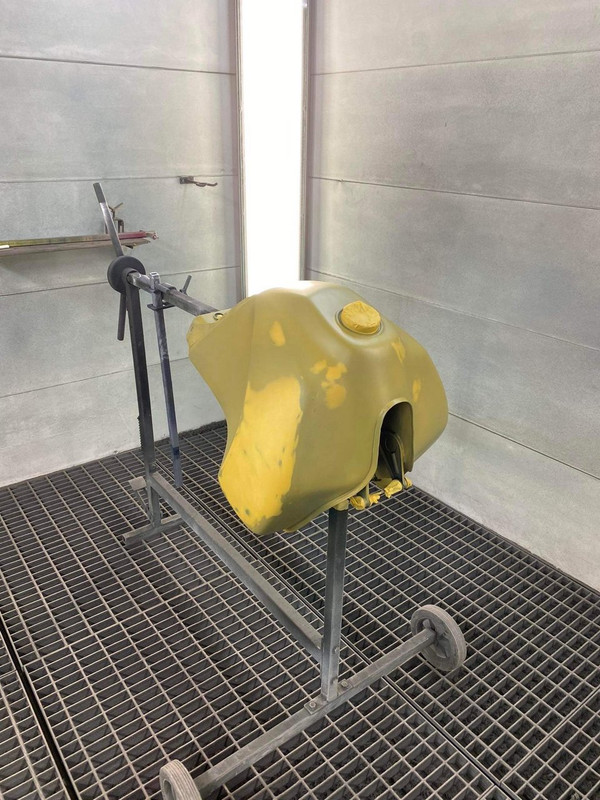
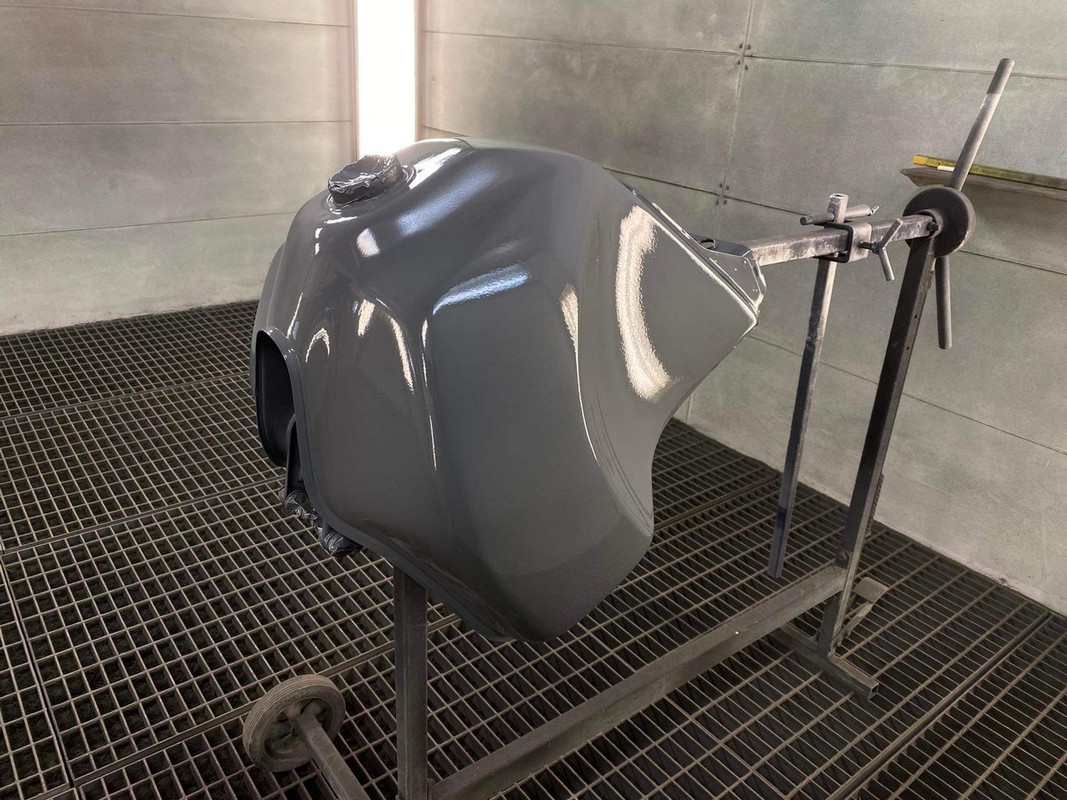
The plastics/tank painting also seems to be finishing shortly.
Re: Ott's 1VJ
Posted: Fri Mar 03, 2023 2:36 pm
by donnybach
Nice.
No I’m no expert, just had to rebuild mine a lot before realising it was my stator.

Looks like clarky has sorted his similar issue, although with a different bike, by swapping out worn jets/needles and emulsion tubes. I doubt you’d really see wear with the naked eye so it could be the last resort to change them if you have no joy.
Bikes looking good.

Re: Ott's 1VJ
Posted: Sat Mar 04, 2023 6:57 am
by scottieh
Bike looks more than good, it’s awesome. Visually and mechanically.
125 does seem low for a main jet, especially considering i have increased my own main jets to 150, even at 1500km altitude. Then again if you can get your revs to 8k and sustain them then you are riding at a completely different caliber than me. WOT at 4k revs in 5th gear felt like i was setting land speed records on these old rattle cans.
What is your big plan for this rebuild? It’s going to look and perform like a factory bike, surely you plan to flog it like one?
Re: Ott's 1VJ
Posted: Sat Mar 04, 2023 10:06 am
by j0epere
Thanks for the great words guys!
Carb wise I think I will keep everything the same until I get to riding it, then can see if and what needs adjusting. I'm thinking of finding another pair of carbs just in case, I've passed on a few opportinities past few years and sure regretting in now.
As for the needles and needle jet's, these might also be the issue, but looking at the prices of OEM bits, it seems lot cheaper to aquire another set of carbs. There are also some Chinese carb rebuild kit's available, but I'm not confident in their interchangeability and quality..
Regarding what to do with the bike, I don't even know. Lot's of time, money and love gas gone into it so don't want to utterly molest it like my other bike, but on the other hand leaving it sitting as a pretty piece seems even worse. I'm thinking of purchasing some crash bars for it to keep the fuel tank safe and then using as it was intended by JCO. That way I won't kill the tank when going down. Funnily enough found one good looking/protecting pair from a Brazil company and price for the bars, shipping and customs is still cheaper than any product I can find from EU
 https://www.enduranceprotetores.com.br/ ... re-1-farol
I won't sell it for sure, likely would come to regret it pretty fast.
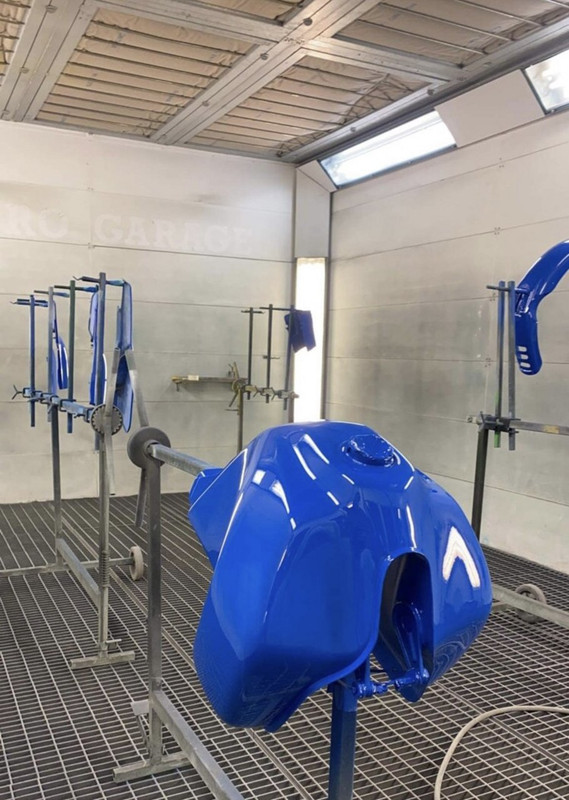
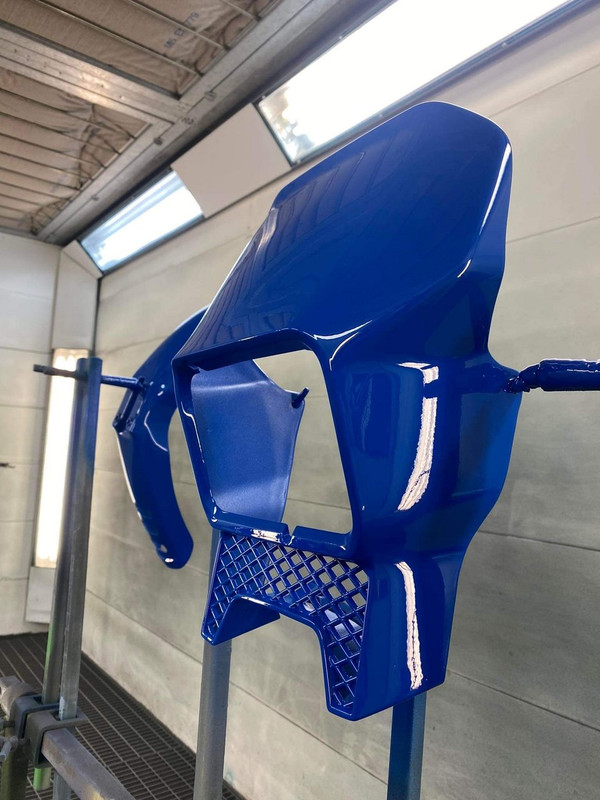
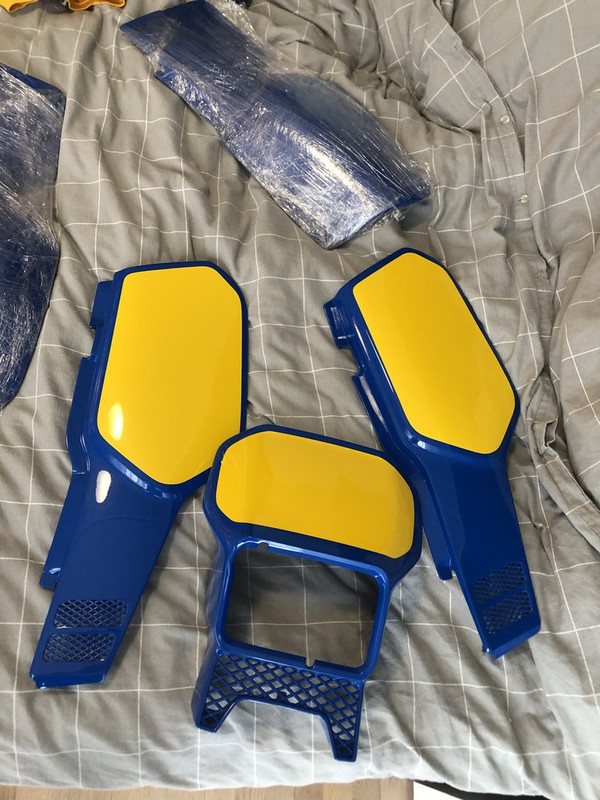
Some more goodies from the paintshop:
Re: Ott's 1VJ
Posted: Sat Mar 04, 2023 10:52 am
by donnybach
Wow good find there with the bars. You should pin this somewhere on here for ease. Didn’t know anyone made stuff for these. £67 in uk pounds And you’re right about the tank. Too rare to not protect.
That paint looks great. Makes me want to get another project to build.
Re: Ott's 1VJ
Posted: Mon Mar 13, 2023 2:23 pm
by j0epere
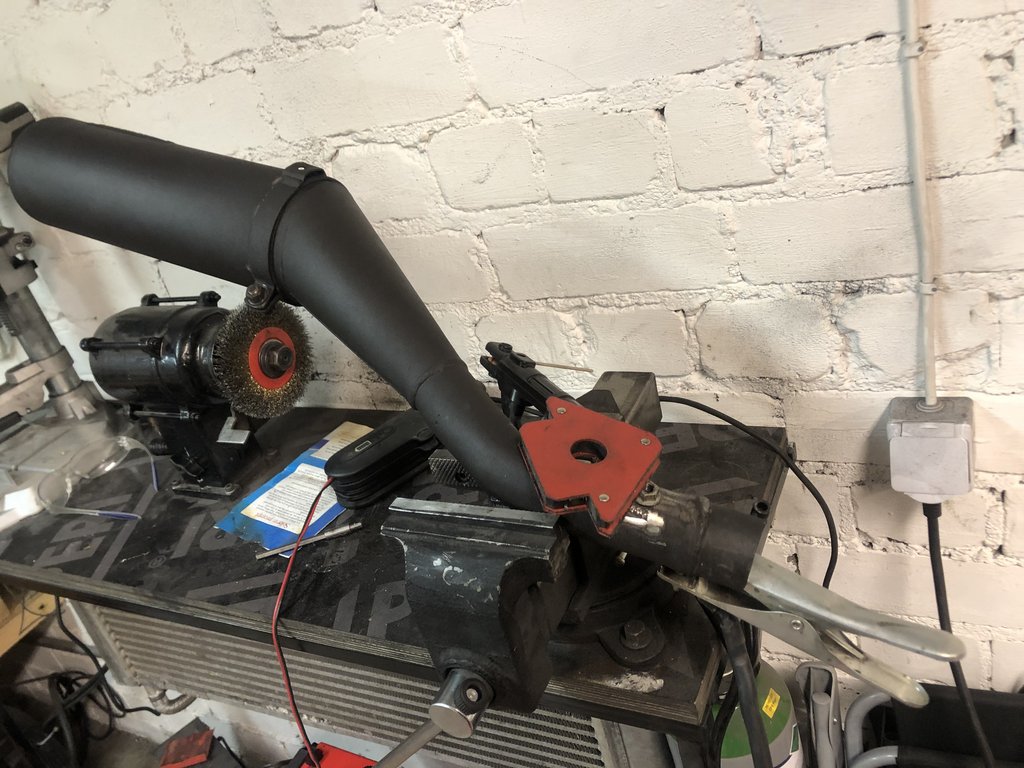
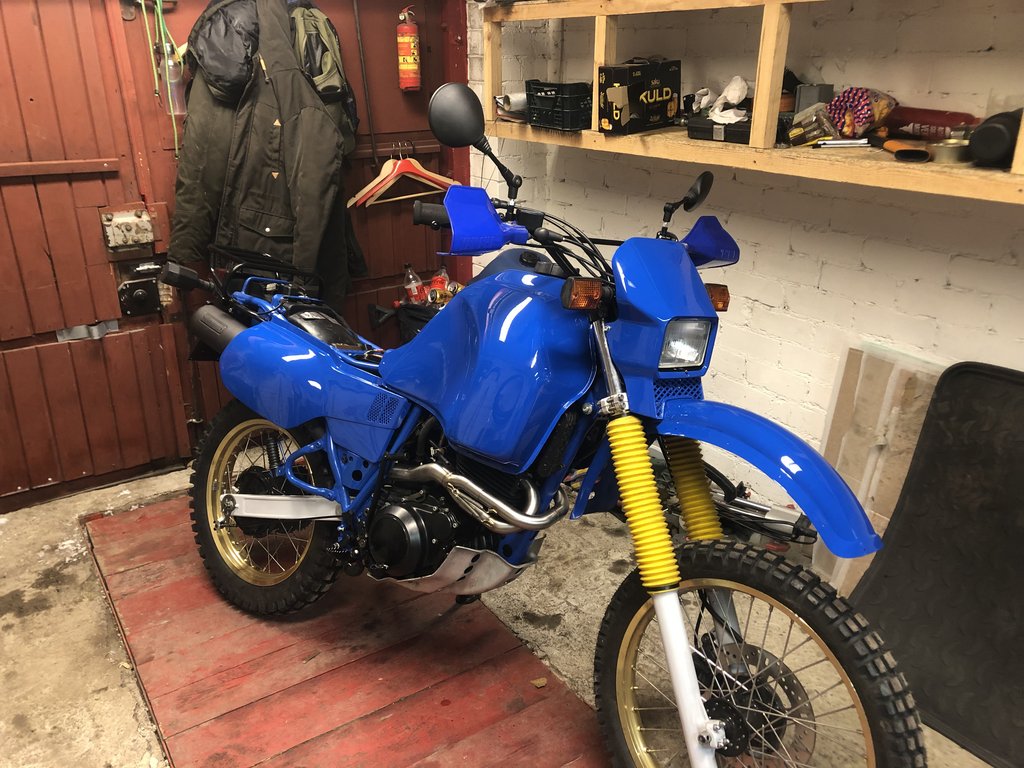
Soo, managed to finally make the Stainless steel exhaust header fit. I was thinking to bed the tubing, but after some tries it seemed more reasonable to fiddle with the connection points. I cut off the middle connection with the angle grinder and released the connector holding the end can. Placed everything back together to find the new location for the middle connection point and welded an nut onto the exhaust pipe.
In addition did my hopefully last bit of powder coating, the passenger footpegs and gear lever got a fresh black coat.
Received all the stuff from painting except from the mudguard extension, this will come later due to being different color. Everything is looking great, and decided to apply the stickers. For the flatter bit's everything was easy and straight forward
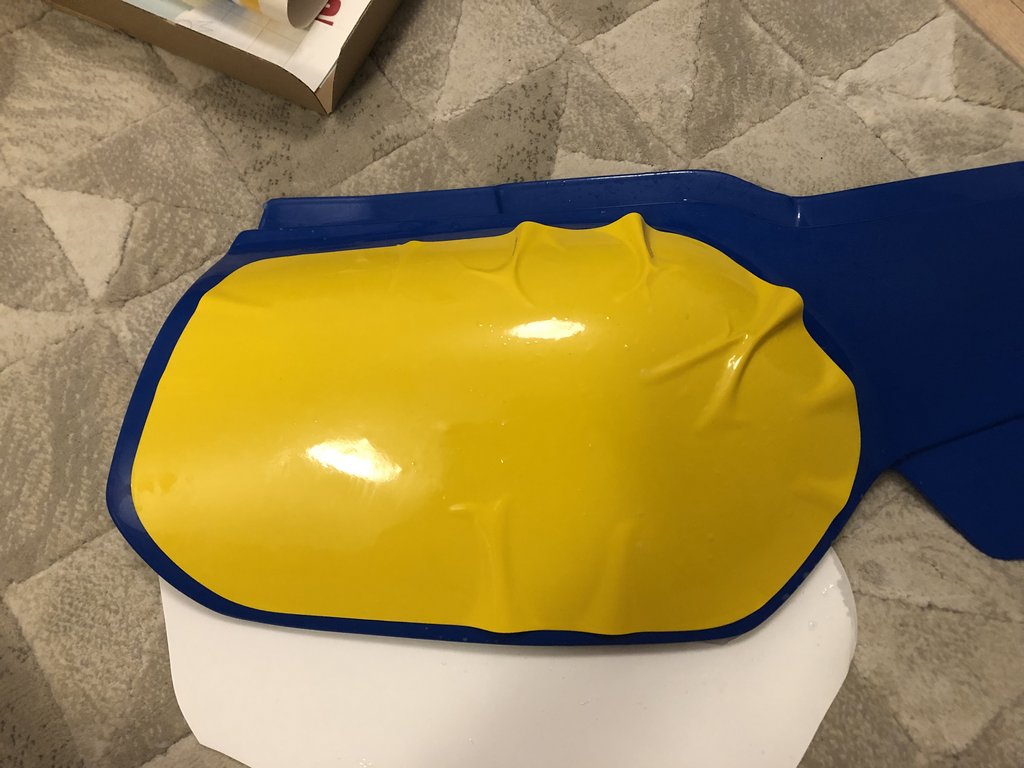
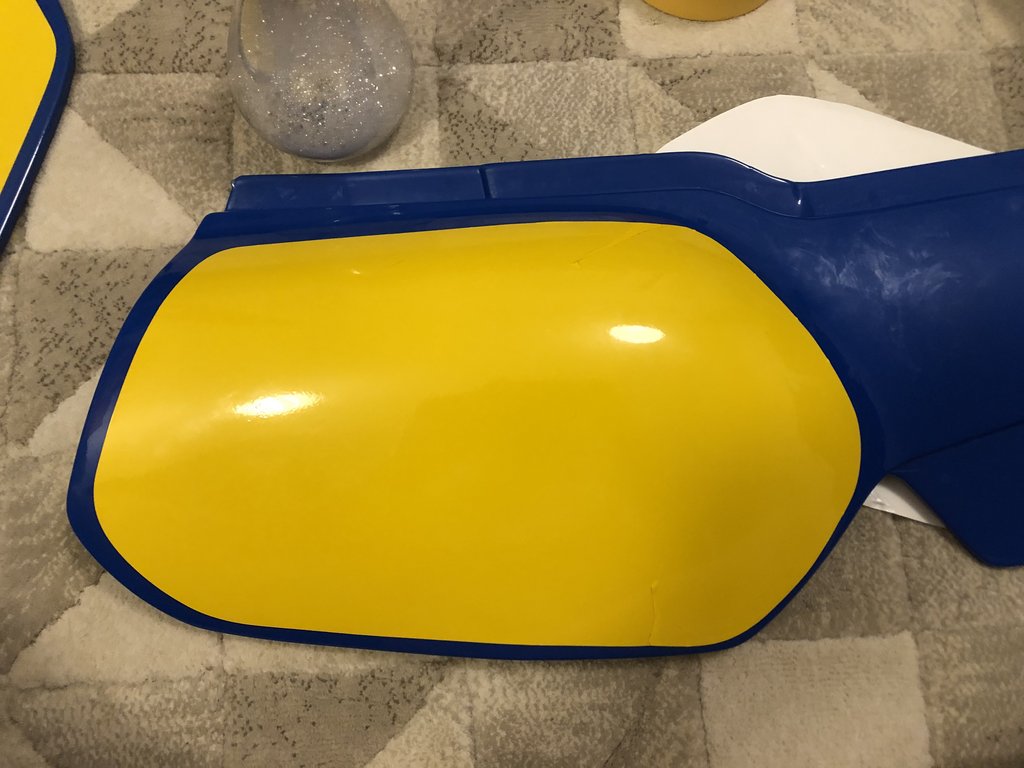
One problem I had was applying the decal to the RH fairing since it has a pretty big curve. First sticker I ruined pretty fast and tried to be more methodical on the second sticker I had. I applied lots of water and tried to use a hairdryer to start shrinking the edges and avoid any greases. I did it approximately for an hour, trying to shrink it equally around the edges, but it feels like the film stopped shrinking at some point and I had no option then to make two cuts. Looks OK on the picture but bothering in real life, I will order some more stickers and likely give it to someone with actual experience. I will also take some Gauloises decals while I'm at it



 . Still want to see a pic of the choke piston though.
