Ott's 1VJ

j0epere
On the ladder
On the ladder
Posts: 105
Joined: Tue Nov 03, 2020 1:10 pm
What Bike or Bikes Do You Own?: Yamaha XT600Z 1VJ
Suzuki XF650 Freewind
Location: Estonia

Re: Ott's 1VJ / Carb diary

Post by j0epere »

Bowler wrote: Sat Apr 10, 2021 8:52 am You should be able to ride away normally, even with a too big main jet. The main jet doesn't start to work until about half WOT (wide open throttle). I'd check the other jets as well.
I took the carbs off again and I'm already getting pretty fast at that :biggrin: I did as Bowler said and checked all the other jets, everything else was stock, only the primary carb main jet was 160.

What did i change this time?
1. Changed the main jet to 140 as per 1VJ parts fiche
2. Put the needles back to original position
3. Set the pilot screw 2,5 turns out(previously it was 4 turns as many have reccomended it for older engines)

What changed?
The bike now rews a bit more freely. Now can easily start moving with the bike, but still bogging in mid range. Just at the sweet spot when you want to give the last bit of gas before changing the gear.

One other weird occurence is how the choke behaves. With a warm engine, when the choke is pulled 1-2mm up, the engine responds good to the throttle. Once I push the choke totally off, the revs increase about 1000RPM and the throttle becomes weird. When I give some throttle and release, the RPM's stay up for a few more seconds before coming back to idle. Sometimes the rpm's stay up and change a bit for 10 seconds or more. The O-ring in the choke slider been changed I don't really know what could affect something like this, could the slider be worn and give some unwanted extra juice to the circuit?

Ott
j0epere
On the ladder
On the ladder
Posts: 105
Joined: Tue Nov 03, 2020 1:10 pm
What Bike or Bikes Do You Own?: Yamaha XT600Z 1VJ
Suzuki XF650 Freewind
Location: Estonia

Re: Ott's 1VJ/ Carb diary

Post by j0epere »

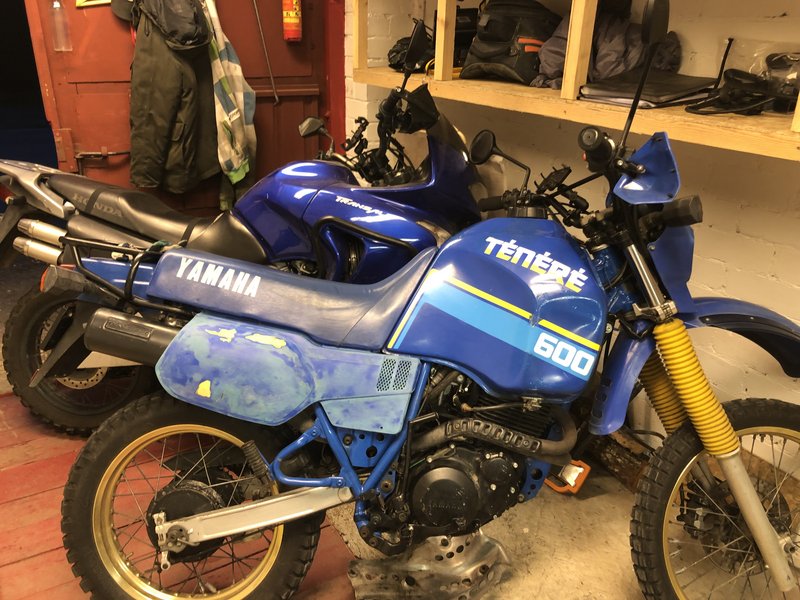
Had some more time with the bike over the weekend. Got it pretty rideable this time and even did a short ride through the city. Comparing to the freewind the riding position is a lot better and can't wait to get it perfectly running and take it on local TET tracks. Starting to think maybe I should take Tenere to this years Italy's trip instead of Freewind. :tenere:

Changed the neutral switch wire that was scratched and grounded itself to the engine case, thus giving constant neutral light. All fixed now.
Noticed a small oil leak coming underneath the starter, turns out it was the one oil seal that i didn't change. Talking about the clutch actuating rod(?) seal. The screw holding it in place was an absolute bitch to unscrew, the solution was to anglegrind a small notch to the edge of the screw and tapping it open with a screwdriver and a hammer.

Back to the carbs:
What did I do?
1. Lowered the main carb needle by 1 position
2. Adjusted the float level to lower the fuel level in the bowl.
3. Changed inlet manifold (to cheap ali ones)

What changed?
The bike again revs up a bit more freely, while riding the bogging in mid-throttle is a lot less, but still there. Can now ride almost like a normal bike, but at certain times still bogging. For example cruising 50-60km/h (4th gear) feels perfect as it falls below the "bogging" range, but at highway speeds it starts bogging like crazy due to the amount of throttle needed to hold certain speed.

Still experiencing the high sitting idle at some points, sometimes even when in gear.

At this point, I'm not even sure which carb I should be focusing anymore. I will likely try lowering the secondary carb needle a notch to see if that gets me any progress.

Ott
j0epere
On the ladder
On the ladder
Posts: 105
Joined: Tue Nov 03, 2020 1:10 pm
What Bike or Bikes Do You Own?: Yamaha XT600Z 1VJ
Suzuki XF650 Freewind
Location: Estonia

Re: Ott's 1VJ/ Carb diary

Post by j0epere »

Got the carbs finally sorted and the bike is finally feeling like it should. Took it for a run discovering the local offroad tracks and it was a blast to ride comparing to my Freewind. Actually had no idea that the small difference in weight, suspension and ground clearance would make it so much better to ride..

Again back to the carbs:
What did I do?
1. Lowered the needle for secondary carb by one position.
2. Adjusted the butterfly valve on the secondary carb so it would start opening as the first carb's slider was about 5mm's from the lowest position. Previously it started opening a lot later.
3. Noticed that the vacuum hose from secondary carb to air cutoff valve was leaking air, didn't check these before because I changed out all the hoses in the carb. I made some wire "clamps" to these hoses to make sure it's properly sealed.

What changed?
Running almost like a charm now, smooth throttling from start to finish and no bogging down while trying to accelarate. My theory is that having the secondary carb's butterfly valve open later created a vacuum that "relieved" itself from the leakage and made the bike bogg down. Once the valve was fully opened, it started getting the fuel and air needed and the bogging stopped. Not sure if any of it's true, but atleast it's working now :tenere:

Still having some trouble with the high sitting idle though. The problem seems to relieve when I lower the throttle position screw(?) and therefore lower the throttle valve and decrease overall idle RPM's. I hope I can resolve this by turning the pilot screw out a turn or two so that the idle RPM will keep the bike running, but the throttle valve will be closed off. Let's see how that theory works out..

Image
j0epere
On the ladder
On the ladder
Posts: 105
Joined: Tue Nov 03, 2020 1:10 pm
What Bike or Bikes Do You Own?: Yamaha XT600Z 1VJ
Suzuki XF650 Freewind
Location: Estonia

Re: Ott's 1VJ/ Crankcase leaking

Post by j0epere »

Hi!

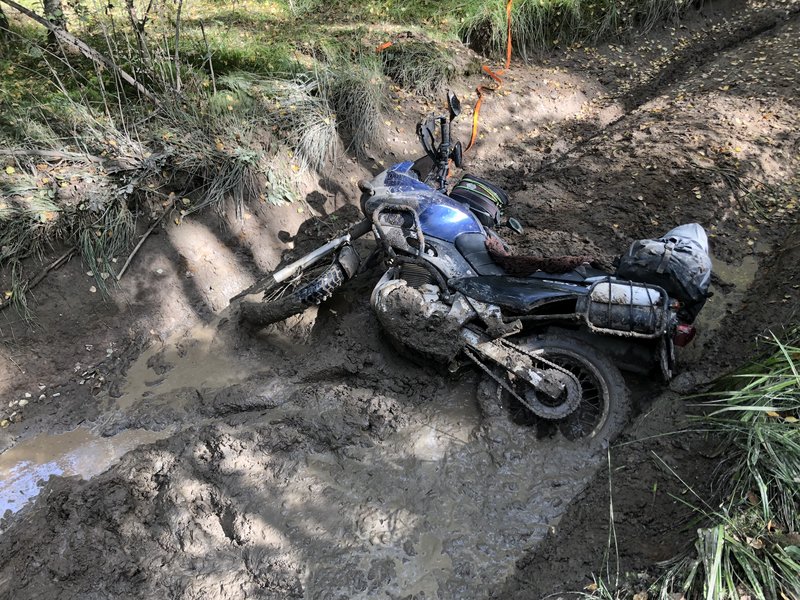
So over the summer I've gathered a few thousand KM's for the Tenere and mostly the engine has been working real great. Still a few bigger issues have popped up that need attention. First of all during on of the offroad trips I managed to drown the bike carbs deep and ever since after that, my starter motor has started to give up. Now it barely turns around and make a nasty grinding noise. During the engine overhaul one of the large rubber gaskets was torn and I tried to fix it with engine sealant, but looks like i failed mightily :)

Secondly the engine crankcase has been leaking quite bad from the crankcase halves, cylinder base gasket and plug from which you can see engine timing. All the gaskets were changed during the engine repair and bolts torqed to spec. Crankcase ventilation should be working great, I tested the breather hose and once the engine is working air seems to be pulsating out of there. I haven't yet changed the oil return valve in the clutch cover and most of the oil seems to be in the crankcase. I'm really hoping that due to excess oil in the crankcase, pressure is higher and is pushing itself out of from all places possible.

Can you please confirm if my theory might be correct, or should the issue be somewhere else?


Image
User avatar
Mezo
Dashingly Handsome
Dashingly Handsome
Posts: 6108
Joined: Wed Mar 23, 2011 11:01 am
What Bike or Bikes Do You Own?: Kymco agility 125 ;-)
Previously Owned Bikes: Honda SS50, Suzuki TS50, Honda CB100, Honda CR125RZ, Yamaha YZ125, Kawasaki KX250, Suzuki TL1000S, Ducati 900SS, Ducati 900SL, a few Tenere`s.
Location: Queensland Australia
Contact:

Re: Ott's 1VJ/ Crankcase leaking

Post by Mezo »

j0epere wrote: Sun Aug 15, 2021 7:39 pmFirst of all during on of the offroad trips I managed to drown the bike carbs deep and ever since after that, my starter motor has started to give up. Now it barely turns around and make a nasty grinding noise. During the engine overhaul one of the large rubber gaskets was torn and I tried to fix it with engine sealant, but looks like i failed mightily :)
1VJ starters are getting rare as they are unique to the 1VJ so i suggest you save the one you have by rebuilding properly, in my opinion it's a very rewarding job (along with brake calipers) :biggrin:

Pull it apart & start cleaning it up whilst waiting for the rebuild kit & holler if you need any advice, you can still kick start the bike if you need to use it.

EDIT: You have not split the engine case right? so you think its been done by the PO correct? have you de-greased/jet washed the engine to be 100% sure its coming from the join in the two halves.

Mezo.
"A wise man makes his own decisions, an ignorant man follows public opinion"
j0epere
On the ladder
On the ladder
Posts: 105
Joined: Tue Nov 03, 2020 1:10 pm
What Bike or Bikes Do You Own?: Yamaha XT600Z 1VJ
Suzuki XF650 Freewind
Location: Estonia

Re: Ott's 1VJ/ Crankcase leaking

Post by j0epere »

Mezo wrote: Mon Aug 16, 2021 11:31 am
1VJ starters are getting rare as they are unique to the 1VJ so i suggest you save the one you have by rebuilding properly, in my opinion it's a very rewarding job (along with brake calipers) :biggrin:

Pull it apart & start cleaning it up whilst waiting for the rebuild kit & holler if you need any advice, you can still kick start the bike if you need to use it.

EDIT: You have not split the engine case right? so you think its been done by the PO correct? have you de-greased/jet washed the engine to be 100% sure its coming from the join in the two halves.

Mezo.
Hi Mezo,

Yep, I will take the starter out today and see what nastyness it contains, the gaskets we're actually 22 EUR a piece OEM, so might take this to get a proper seal.

Regarding the engine, if you look one page back, I took totally to bits and pieces last winter. Didn't really skimp on sealant and torqued everything according to spec. I washed the engine properly and I'm fairly sure that it's leaking from all three places, crankcase halves, cylinder base and the beforementioned plug..

Replacement oil return valve should arrive shortly so I can see of that helps :)

Ott
j0epere
On the ladder
On the ladder
Posts: 105
Joined: Tue Nov 03, 2020 1:10 pm
What Bike or Bikes Do You Own?: Yamaha XT600Z 1VJ
Suzuki XF650 Freewind
Location: Estonia

Re: Ott's 1VJ

Post by j0epere »

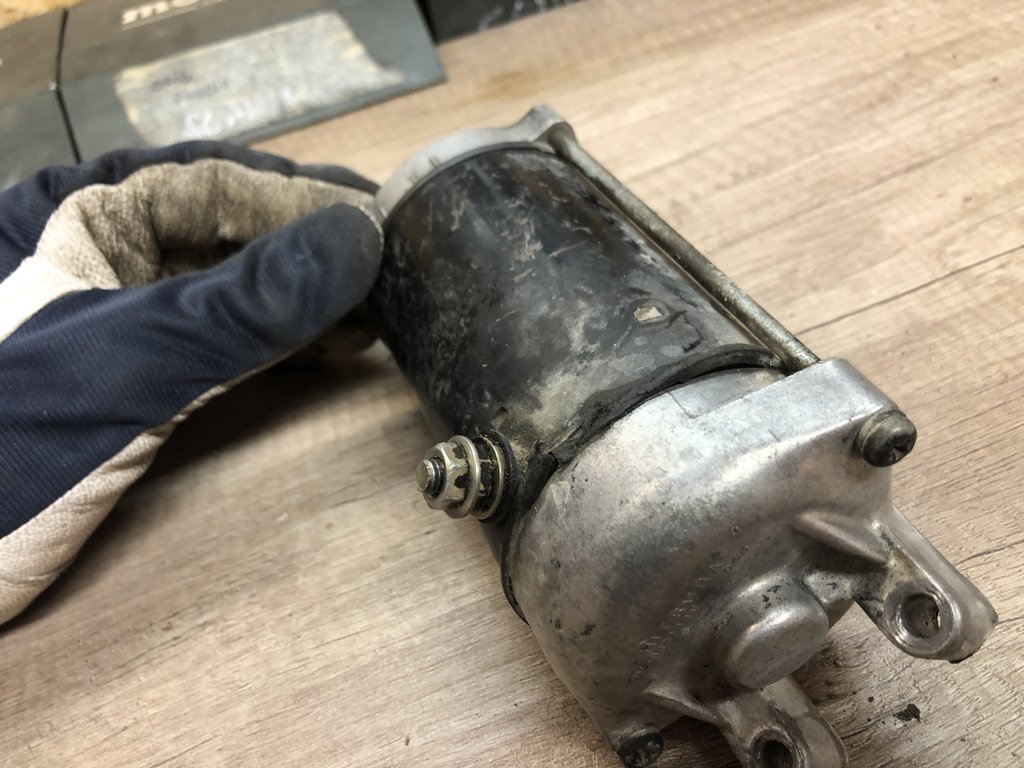
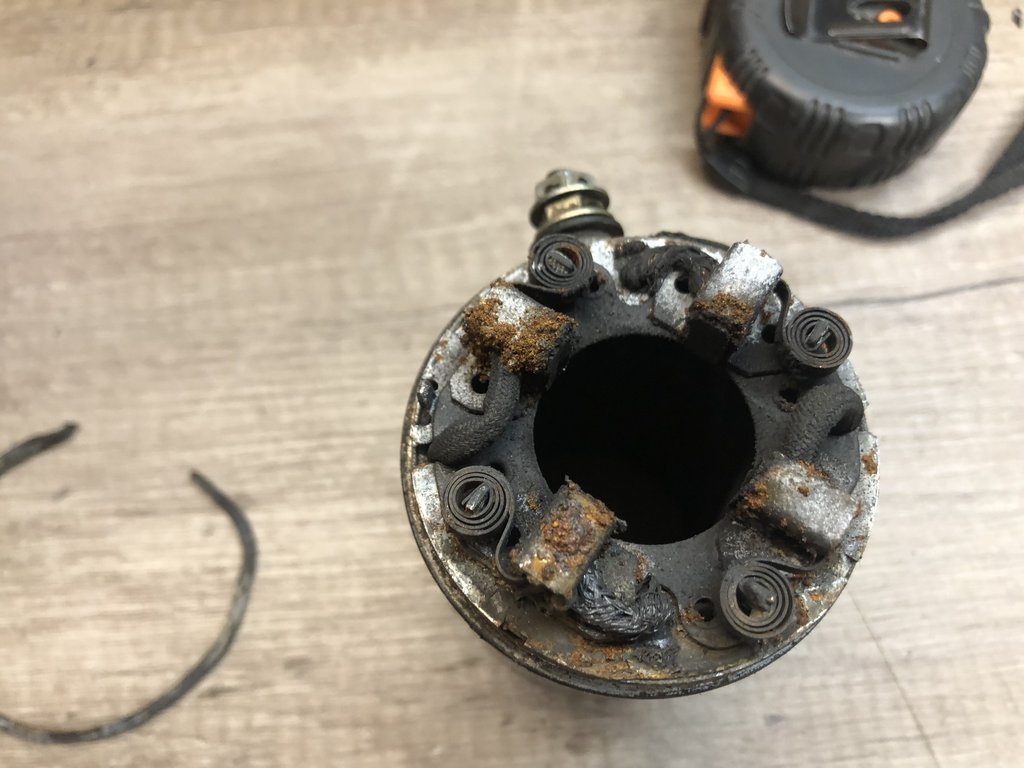
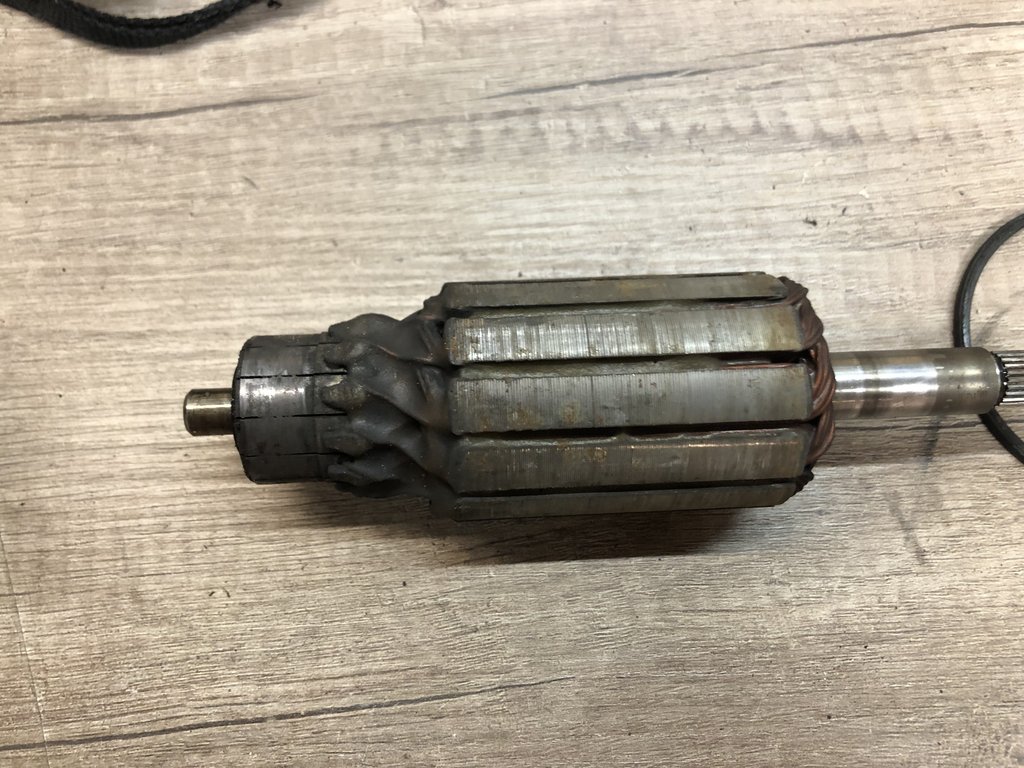
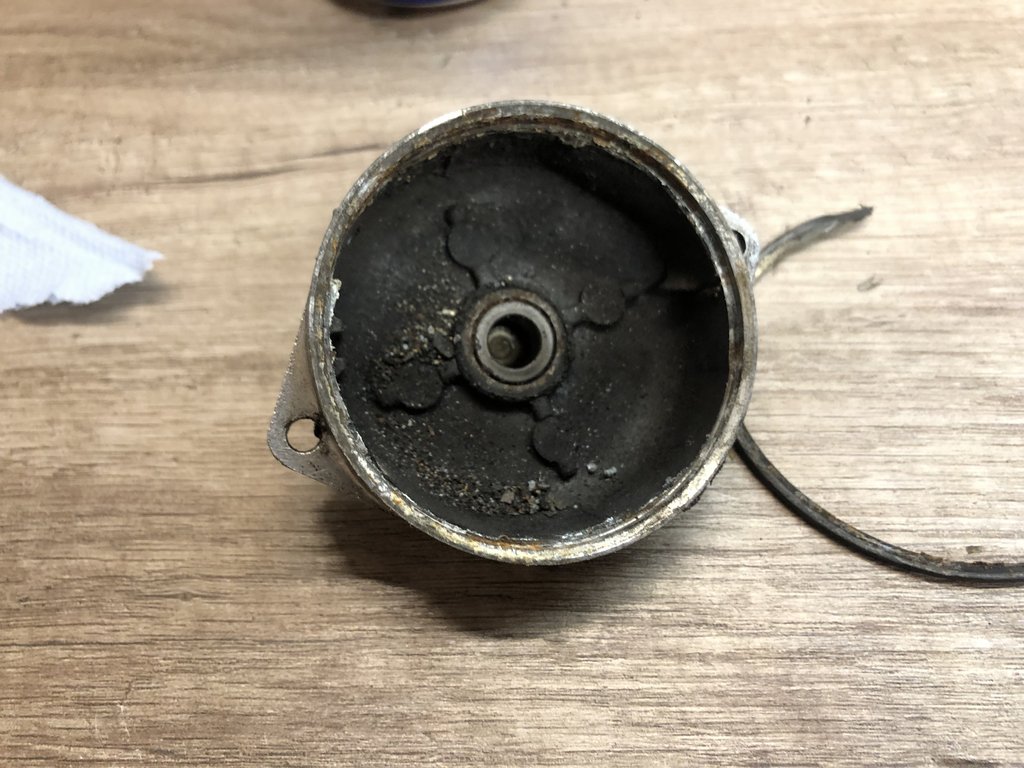
Opened up the starter motor and things we're a lot worse than expected, the outer seal has gotten loose and lots of water got in. Can't even believe that this happen during one summer and only few thousand kilometers. I got everything well cleaned up with scotch brite and seems like the unit is still salveagable.

I'm having trouble finding the rebuild KIT that confirms to suit 1VJ models, can you confirm that the inner workings (brush assembly) is identical to 3AJ and other E-start models? Currently looking at the KIT supplied by Wemoto:
https://www.wemoto.com/bikes/yamaha/xt_ ... repair_kit

Few pictures of the nastyness below, I guess future Tenerists can learn from my stupidity and always make sure that their starters are well sealed :tenere:

Image

Image

Image

Image
donnybach
Almost there
Almost there
Posts: 630
Joined: Fri Jul 15, 2016 3:35 pm
What Bike or Bikes Do You Own?: tenere 1vj
Tenere 700
Previously Owned Bikes: blade, cbr6
Location: Cardiff, UK

Re: Ott's 1VJ

Post by donnybach »

I know it’s a bit late, but Ref your carbs, stick as close to standard as possible, 46 pilot, 140/145/150 main, 125 secondary carb main. Float height 25-27mm, but more importantly 6-8mm below chamber/carb body join. Primary slide is 0-1mm above body. Both needles set in middle of 5 rings. Was going to post some pics of the manual for you. Will do if I figure out the tech🤔. Pilot might need a 48 if you have a “race” can etc.
For leaks, I only use loctite crankcase/flange sealant. Not just centre join but anything that doesn’t need to come off too often. Old gaskets are toss.
Nice paint job
Parts diagram is online. Full reprint of the manual is on eBay, about £60. Would be handy for you. I built mine before I found it.
Check for obvious stuff too. The guy I bought mine off used a copper washer instead of o rings in the oil tank. 😳
Keep the pics coming.
j0epere
On the ladder
On the ladder
Posts: 105
Joined: Tue Nov 03, 2020 1:10 pm
What Bike or Bikes Do You Own?: Yamaha XT600Z 1VJ
Suzuki XF650 Freewind
Location: Estonia

Re: Ott's 1VJ

Post by j0epere »

Thanks for the great advice Donnybach!

Regarding Tenere wise things have been quite calm and I haven't touched the mechanical side too much.
j0epere wrote: Tue Aug 17, 2021 7:06 am I'm having trouble finding the rebuild KIT that confirms to suit 1VJ models, can you confirm that the inner workings (brush assembly) is identical to 3AJ and other E-start models? Currently looking at the KIT supplied by Wemoto:
https://www.wemoto.com/bikes/yamaha/xt_ ... repair_kit

Just for information the 3AJ Brush assembly DOES NOT fit 1VJ starter motor well. I managed to still use it, but it required a bit of angle grinding to fit the brush assembly inside the starter housing. First of all the diameter of 3AJ brush assembly was a 1-2 mm's bigger so I had to grind the whole circumference + the few of the bent inserts were in too big/ in the wrong location.
Overall the starter seems to be working great, but I would be much more comfortable installing a correct set.

What else, I changed the oil return valve on my bike. First when taking off the case the almost brand new case gasket got broken so had to wait a new one for a week. When the gasket arrived and I went to install the clutch cover back on and went to torque the bolts. I figured to torque them 12Nm, but while doing so I managed to crack few the collars(??) on the cover. https://prnt.sc/20qxj4w Not sure if the problem is Me, or is the magnesium covers really so shitty.. In any ways I will have to find another clutch cover.

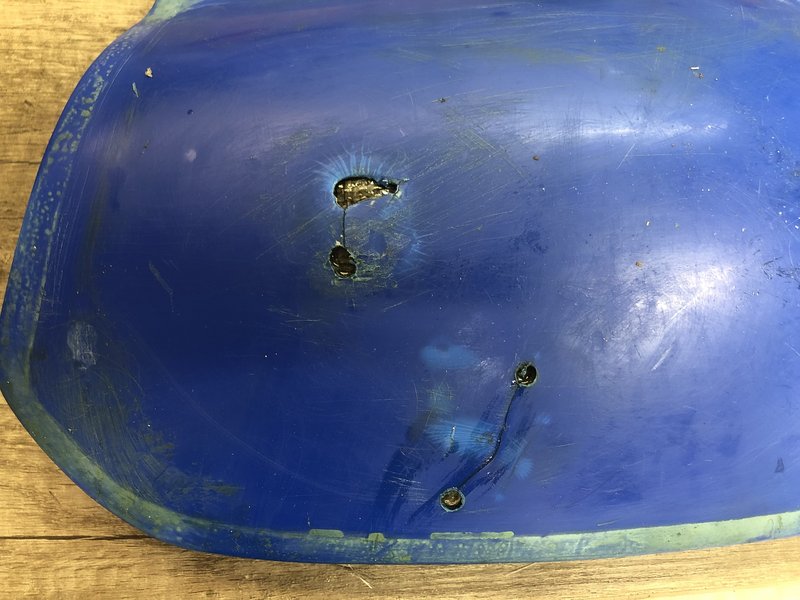
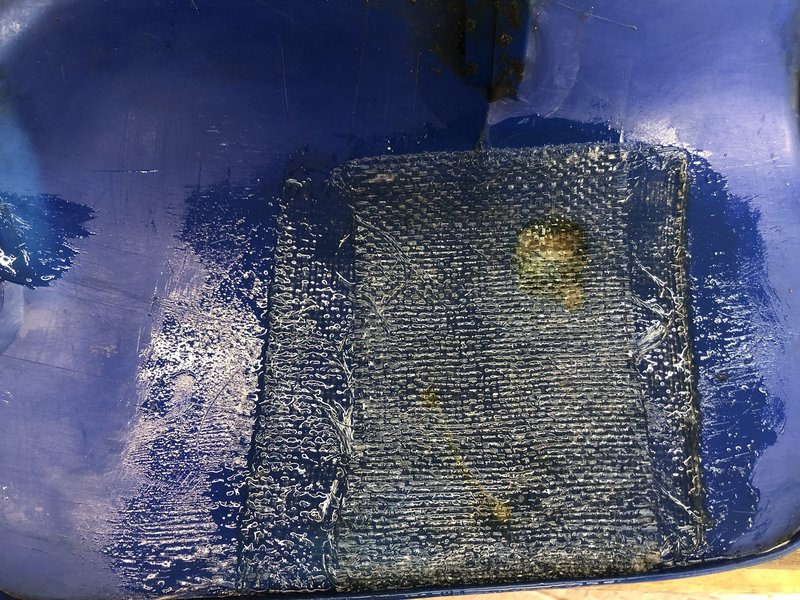
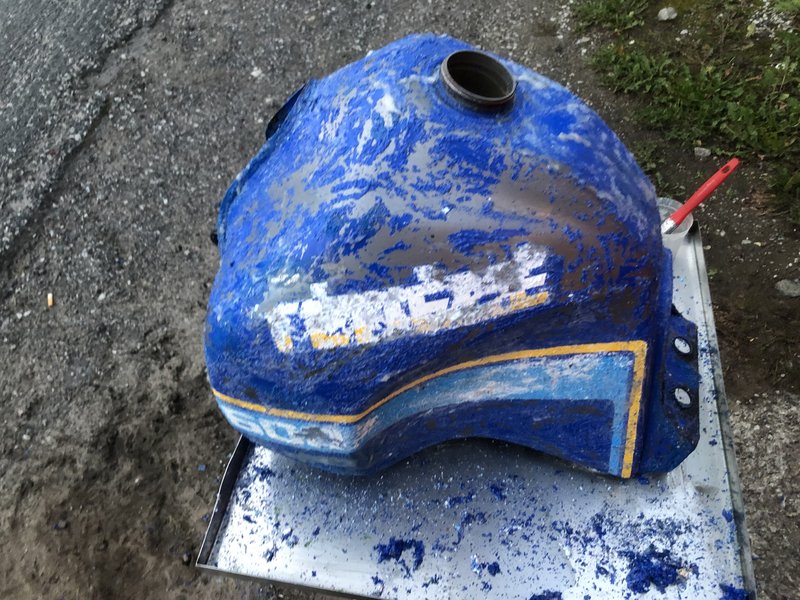
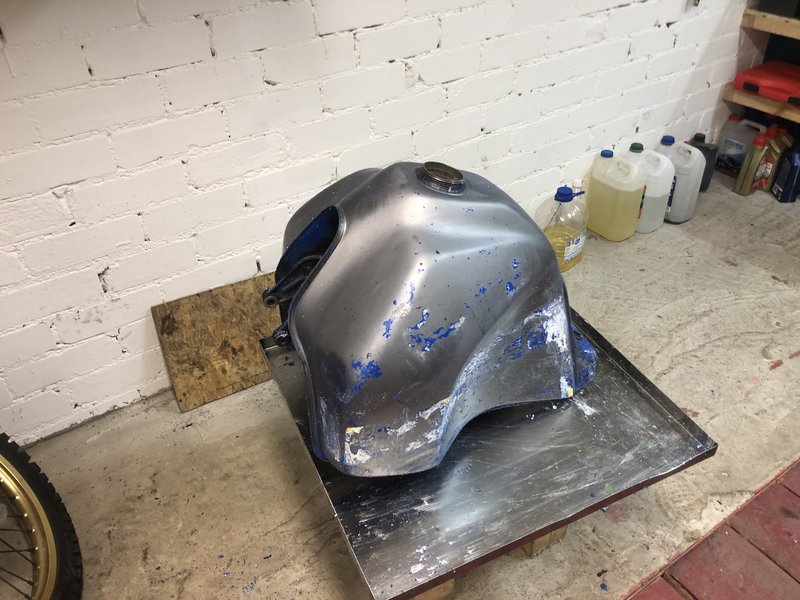
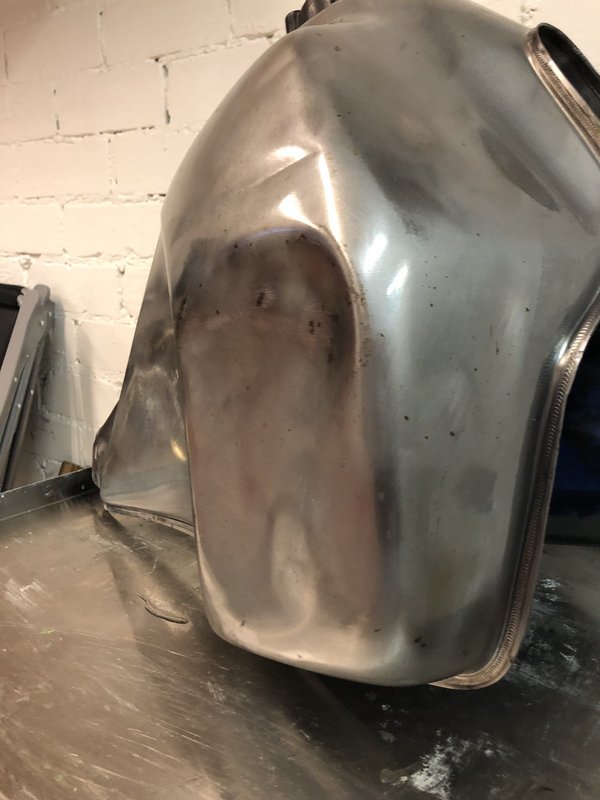
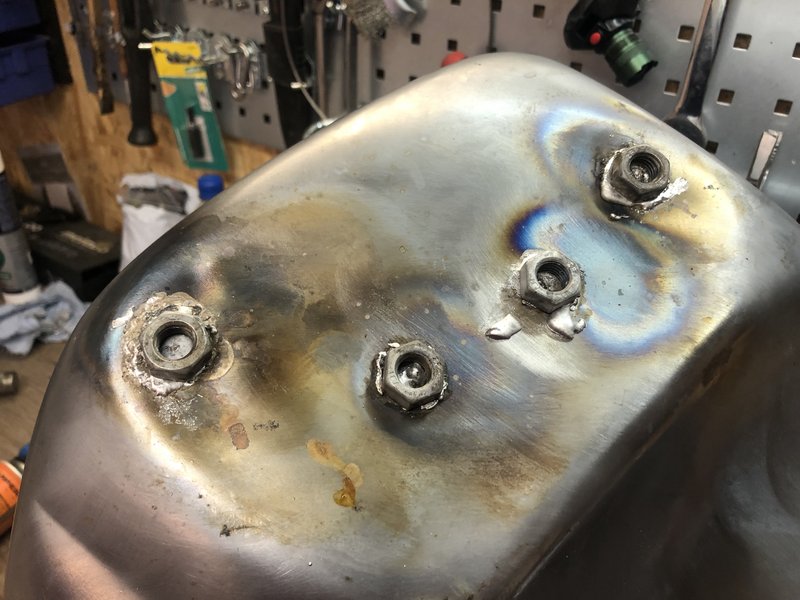
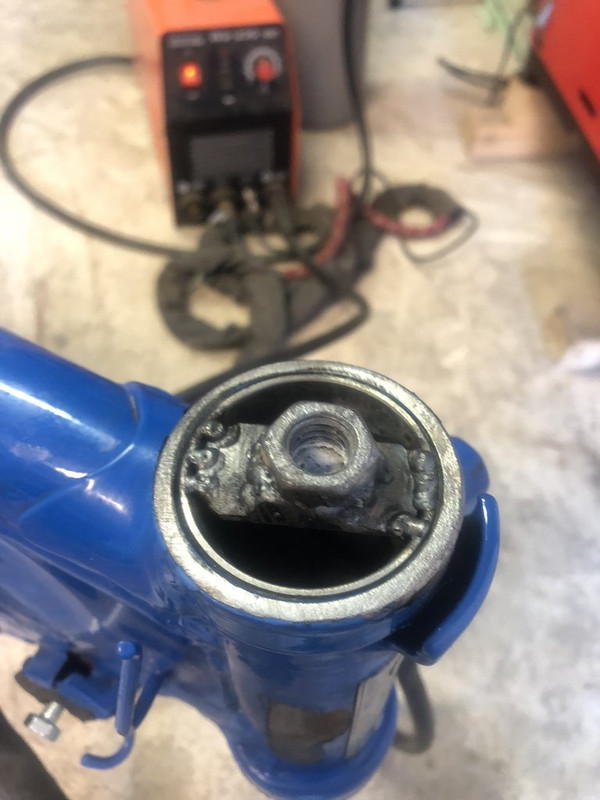
Also I started to strip down and repair the plastics + the metal tank. Had to do some fiberglass repairs for the cracks and the hole in the side cover. managed to find another set of rear plastics in Estonia and figured to clean and have these painted as well. Either as a backup of put these to the market once painted. Stripping the metal tank was a very satisfying job, but unfurtunately I was unable to remove the dents myself. I tried to solder some nut's in the dent are and pull these off with a slide hammer, but it gave very little to no results. I have now taken the tank to experts and hope to get it back by christmas :tenere:

Some pictures:
Image
Image
Image
Image
Image
Image
Image
Image
j0epere
On the ladder
On the ladder
Posts: 105
Joined: Tue Nov 03, 2020 1:10 pm
What Bike or Bikes Do You Own?: Yamaha XT600Z 1VJ
Suzuki XF650 Freewind
Location: Estonia

Re: Ott's 1VJ

Post by j0epere »

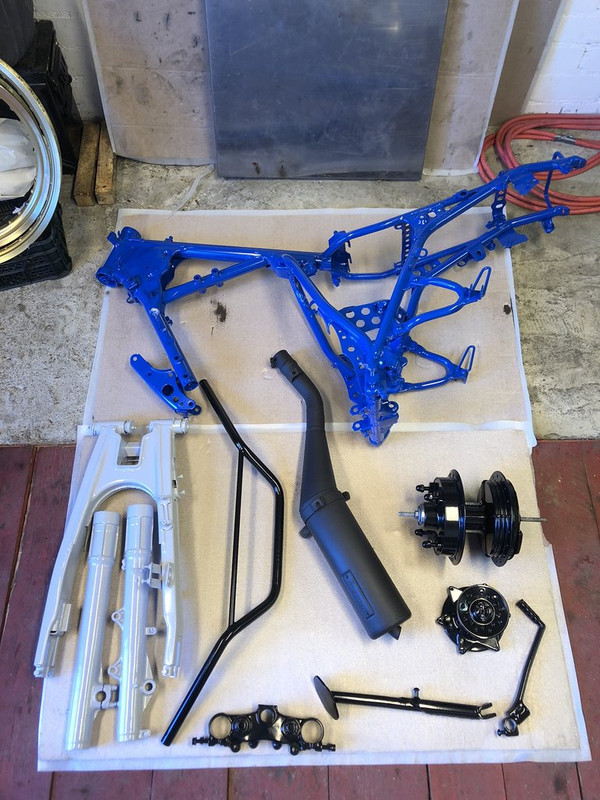
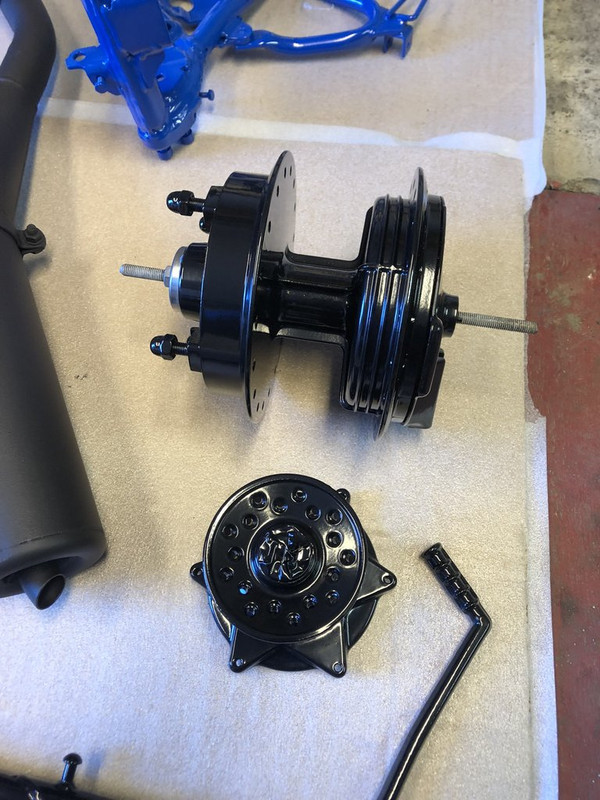
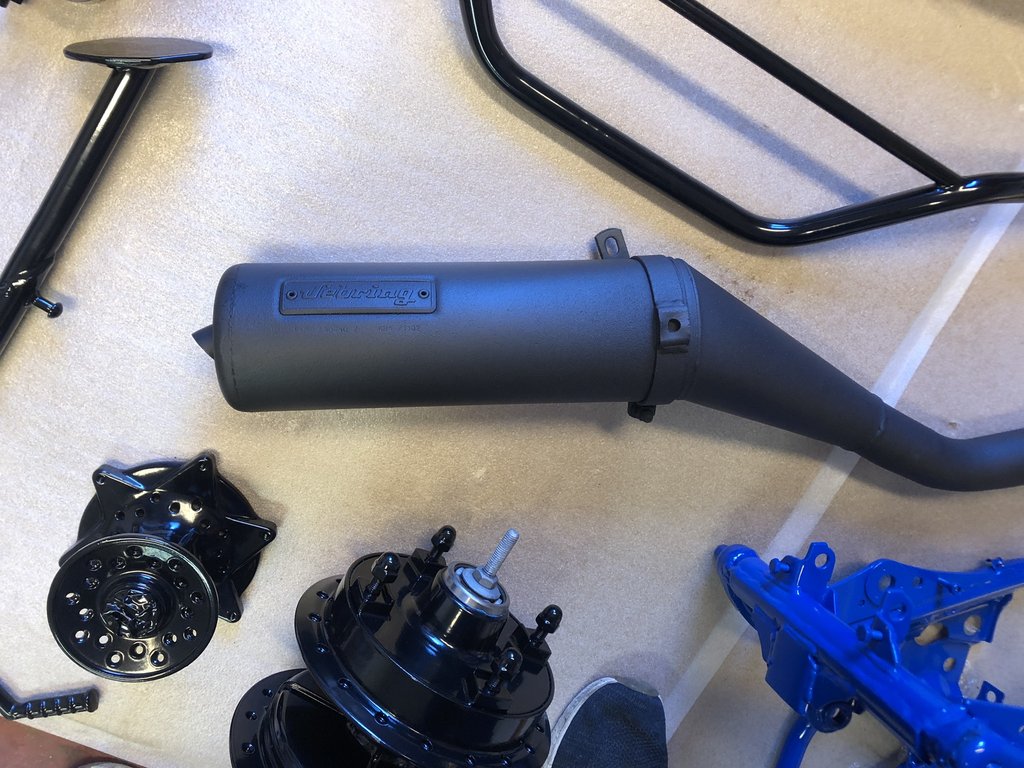
A year has passed and since I managed to create some offspring during that time, the Tenere project has been not the highest of priority. Past few months I have had some time to start again. I have decided to not only paint the Tank and the plastics, but paint it from the frame upwards. The bike has now been fully disassembled and is in a state in which many guys in this forum purchase their basket cases :lol:

Took me a good few weeks to strip everything down and prepare the bits for powder coating. Yesterday, I finally got the call that the work is done and this morning I picked everything up!

The next steps will likely be:
Wheels :
When removing the hubs, it came apparent that the spoke nuts are corroded and new spokes are also needed. Got a set of stainless spokes from KEDO and plan is to send the spokes, hubs, rims and fresh tires to a workshop so they can assemble everything. I have changed the tires on my freewind at home, but changing only with tire levers will create quite a bit of damage to the rim, so better give it to professionals.

Frame:
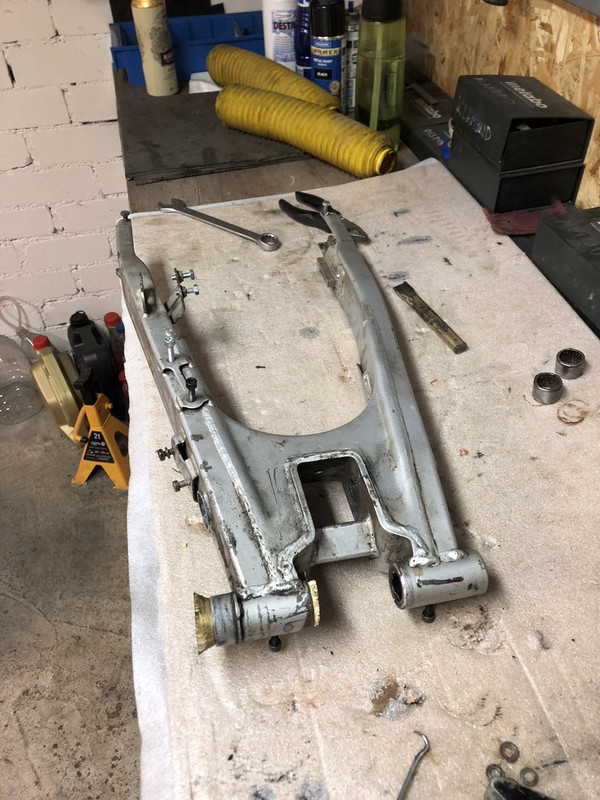
I will change the swingarm bearings with the KIT ordered from KEDO (2 bearings and seals), but this only covers the Swingarm connection to the frame. Need to check the freeplay on the link assembly, but it is mostly consisting of metal to metal bushes, and not too many bearings involved. Heard from this forum that some freeplay is inevitable. Have you guys changes all the metal bushes as well when doing the Overhaul?
The Swingarm(and forks) Colour didn't turn out exactly as I hoped. I had them use RAL9006 which I read somewhere should be more or less accurate, but seems a bit off from the original.

Steering head bearings will ofcourse be changed. I used part of the old bearing as a cover for powder coating, hopefully I can get it the slide hammered out nicely.

Upper triple clamp bushings (That connect handlebar to the clamp) will need to be changed as well. I forgot these on the clamp and there was some melting going on :) THe original ones are pretty expensive (40EUR/EA), Kedo is selling full poly bushes, but I'm considering having these 3D printed.
The bottom triple clamp I didn't send to painting as the original setting seems to be that the upper one is black and bottom one aluminium.

Forks will get new seals, also there is some rust spots on the chrome surface(Mostly on the upper part between the clamps), I plan to use the softest scotch brite and water to hopefully get these out. I'm not sure if it will keep the rust away or should I put some cleacoat on these..


Since I got really interested in the technology of Powder coating, I bought myself a small gun and a tiny kitchen oven that will give me a chance to try out the craft on smaller bits that I didn't deliver to powder coater.

Cheers!
Pictures below:
Image
Image
Image
Image
Image
Image
Image
Image
Image
Image
Post Reply